How to Use Checkboxes for Approvals, and Change the Checkbox Text
Learn how to customize checkboxes for various uses, create rating systems, add dropdown menus, and more. Explore the creative possibilities of Google Sheets!
Today, we're going to take a basic function of Google Sheets, which is the checkbox, and we are going to take it to its nth degree. We are going to bastardize it. We are going to go crazy; get a little creative with checkboxes today.
By the time you have finished this tutorial, you will know how you can use checkboxes for different purposes and how you can style them. You can do more with Google Sheets.
Things we’re going to cover for this Google Sheets tutorial:
- Make checkbox bigger than the cell, so that we can hide that. It could even become a button.
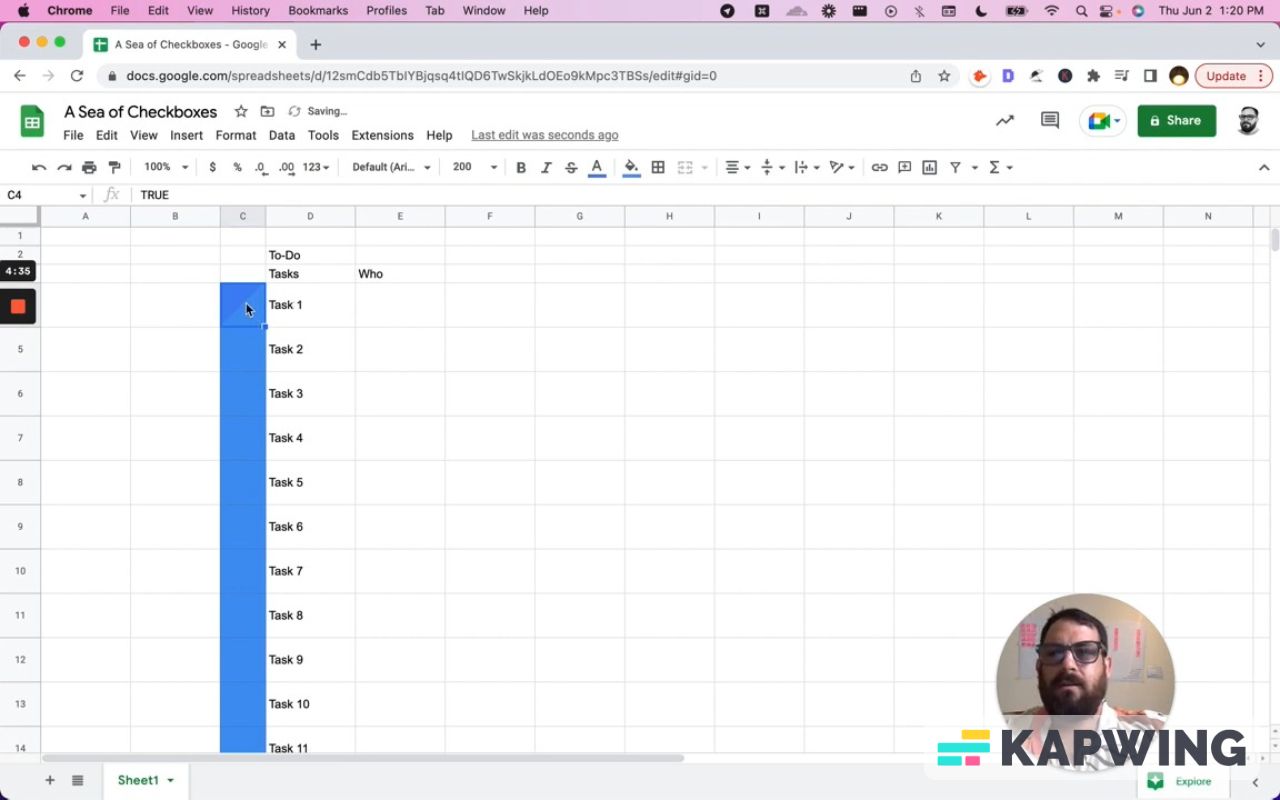
- Create a sea of checkboxes if there are many multiple true or false things.
- Change the true or false to a different text.
- Add dropdown menus. These are great for certain things that checkboxes don’t do well.
- Create a rating.
Make checkbox bigger than the cell
You know how we might have a task? We have a set of tasks and maybe even indicate who is assigned to them. Let's get started with this.
Get a brand new sheet and we’ll start from scratch.
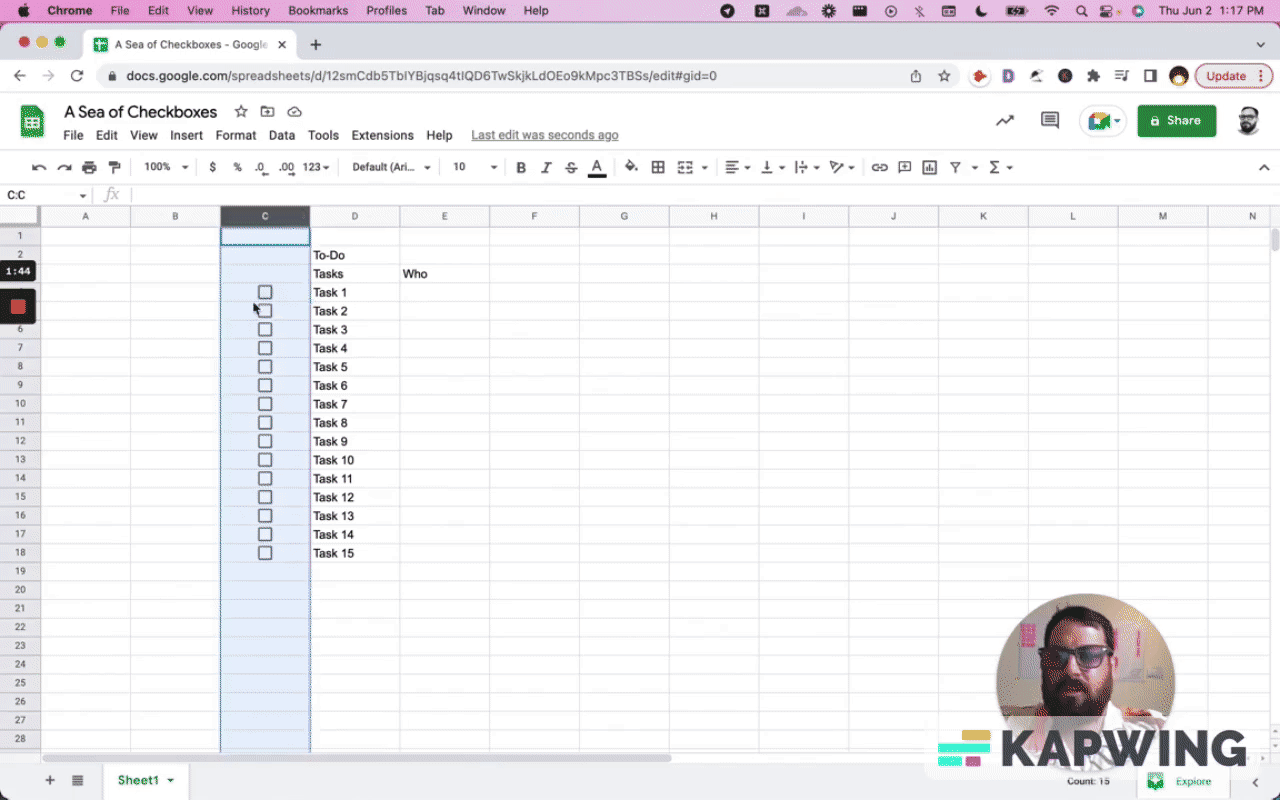
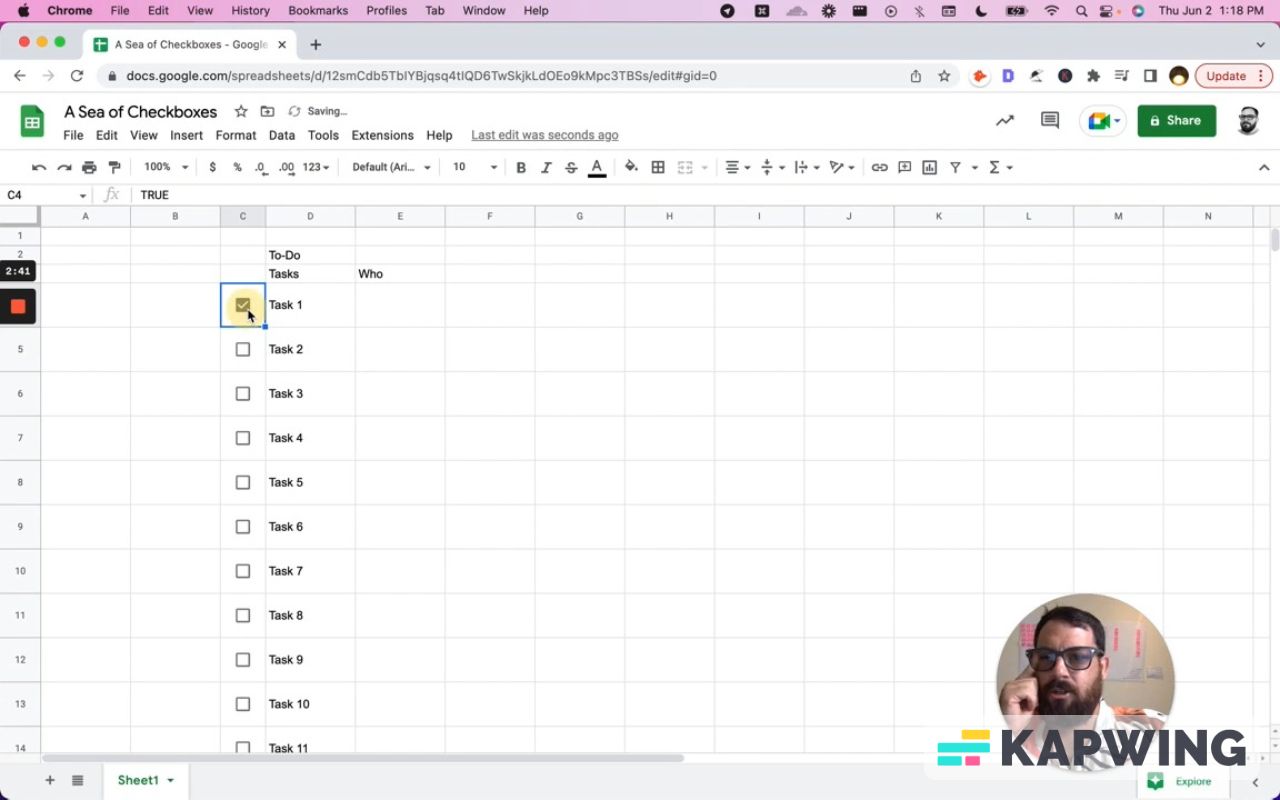
Insert a checkbox. You might even copy and paste this all the way down. You have test one, test two, test three, test four. Great! You can keep adding more.
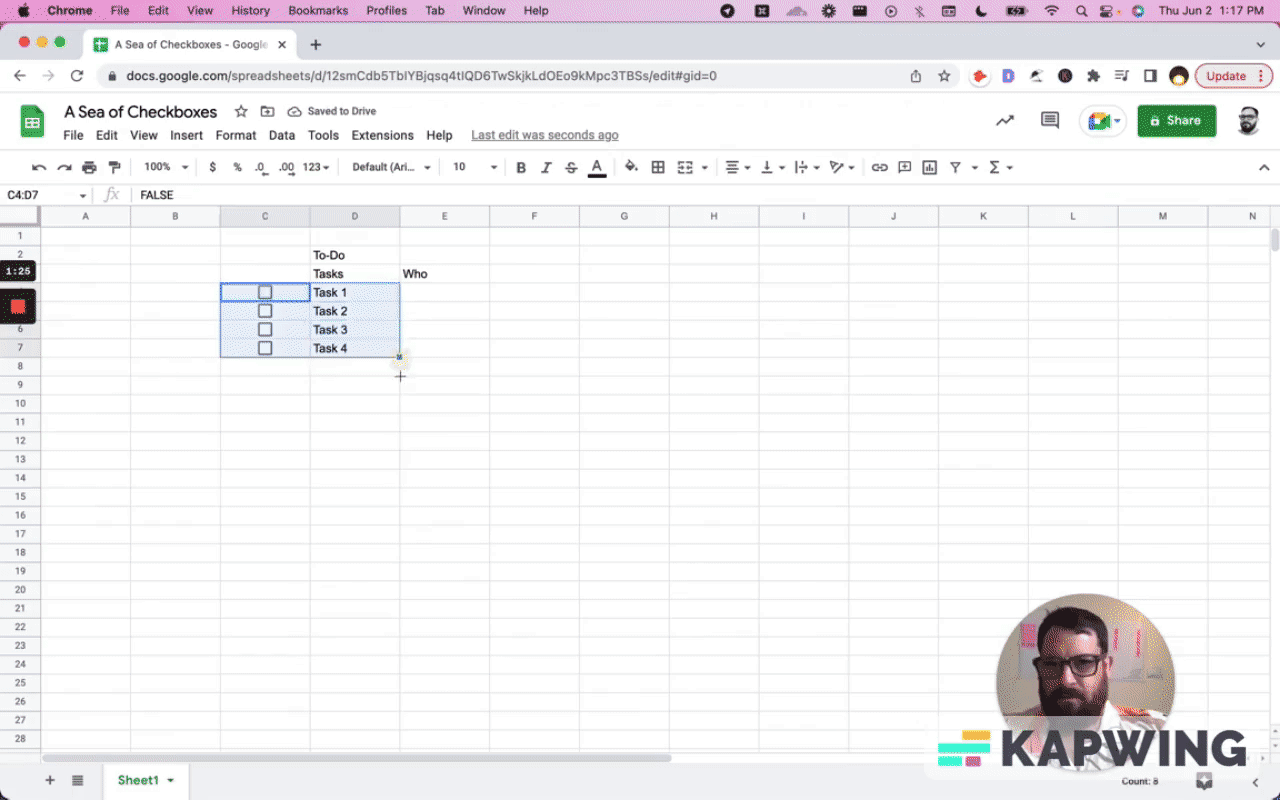
I always like to have a little bit of room for the cells, so they don't all blur together.
I like to also take the checkbox box. Usually, the checkbox is so tiny in this sort of wide angle.
So then I will resize the column to 50 pixels and make its column smaller. That’s perfect!
It still looks rectangular. What I might do as well is I will take these rows, right click on them, and then resize them. I want this checkbox to be a square, so I will specify that it's 50.

We get a lot of nice room. We get our checkbox in the middle of a square.
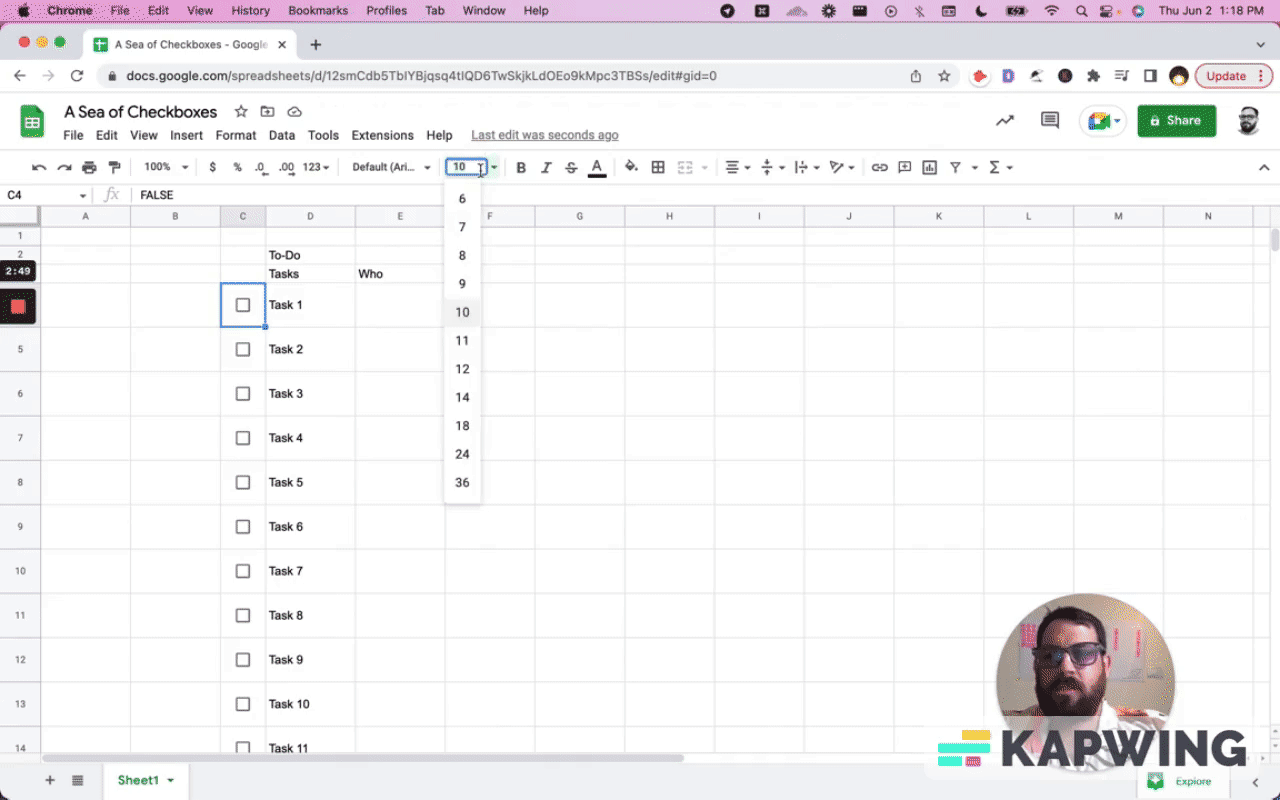
You can change the size of the checkbox to 100. Now what happens? It checks and the whole box is a checkbox, but you don't see the checkbox.
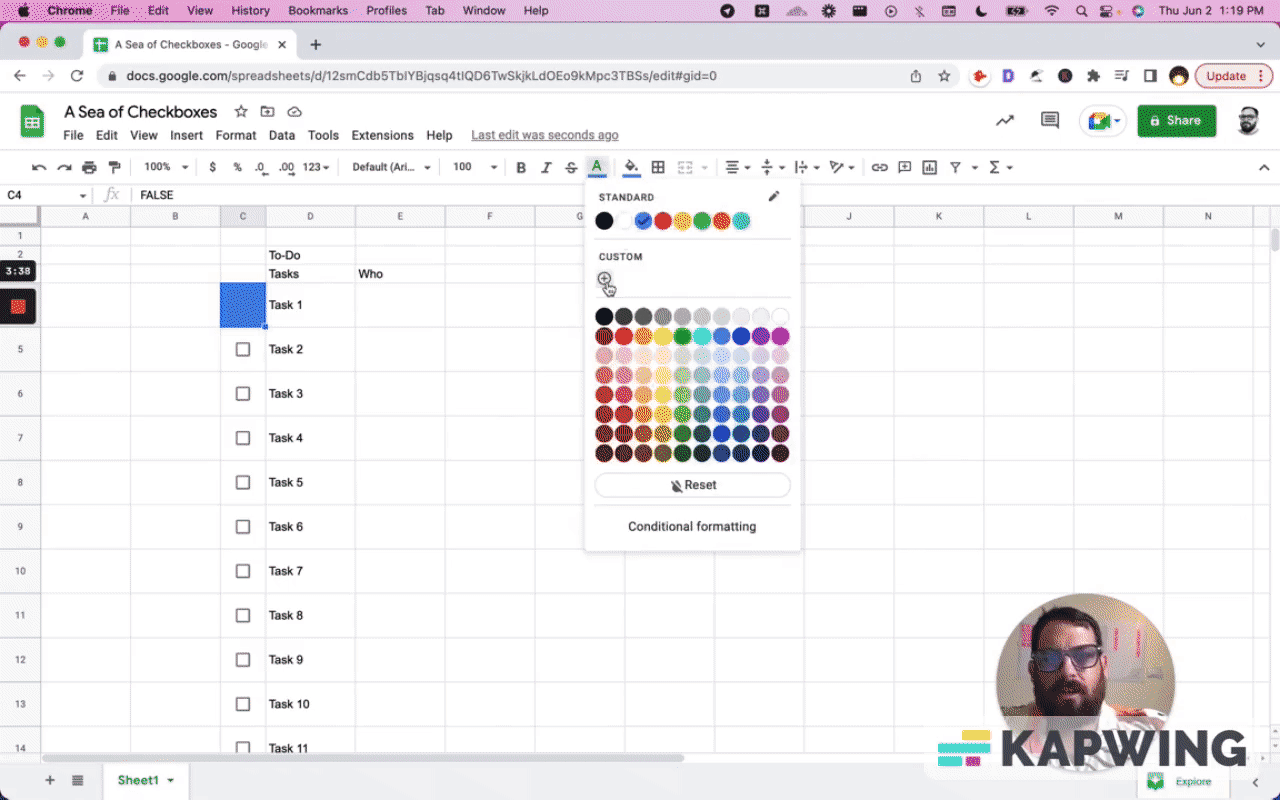
Sometimes you don't need to see the checkbox. What you can do is change the font color and the fill color to blue.

And if you click on that blue checkbox, you’ll get this message:
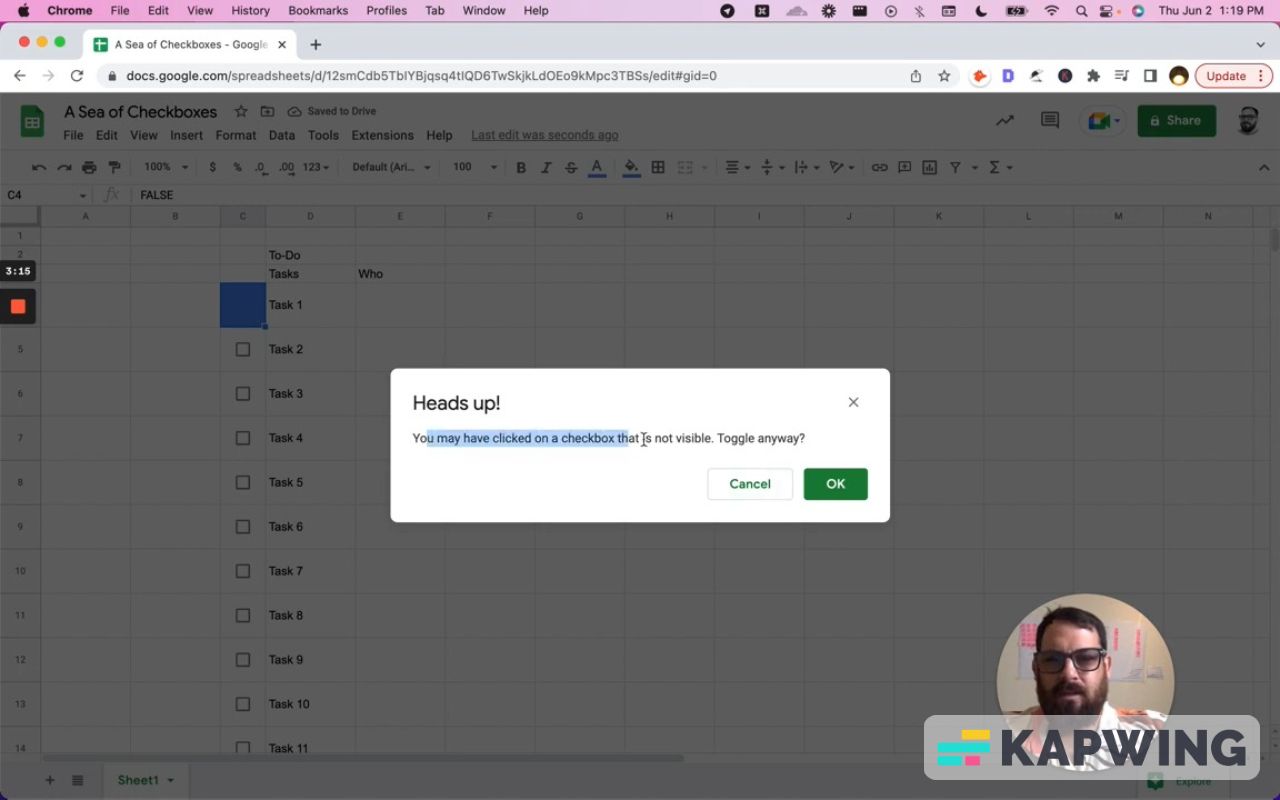
Why is that? It's because both the text color and the fill color are exactly the same. You don't want this. You don't want it to necessarily not know if it's checked or not. Sometimes, we just want to check it and move on with our lives.
What you can do is create a custom color. Let's use this custom color as the text and use a custom color as the fill. We’re going to make the colors just a little bit different. Now you don't get that message and you get a checkbox!
You can make your checkboxes big as you want to fill up the entire thing, even though it's only 50 and even though the square is only 50 pixels by 50 pixels. The font size is now 200.
That's a pretty cool thing to do. We can copy it all the way down this column. Now these are buttons, essentially, not just check boxes.
Changing the true or false values
A checkbox is only true or false. It's a visual representation of true or false and you can actually change that.
Insert a checkbox, right click on that, and go to Data Validation.

You see here it says “Criteria.” Right under it, it says “Use custom cell values” and you can actually change this to yes and no. Save it.
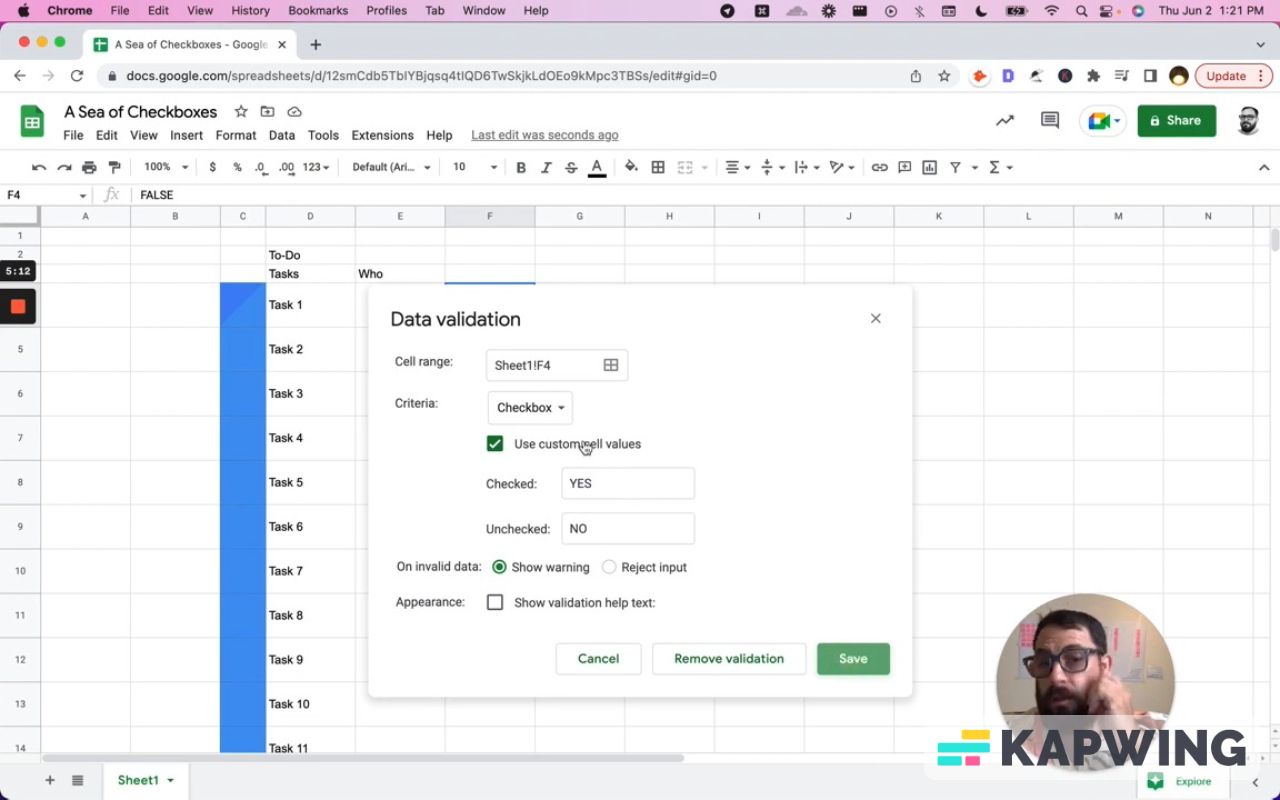
And now, whenever this is checked off, it says YES. We can copy and paste this all the way down.
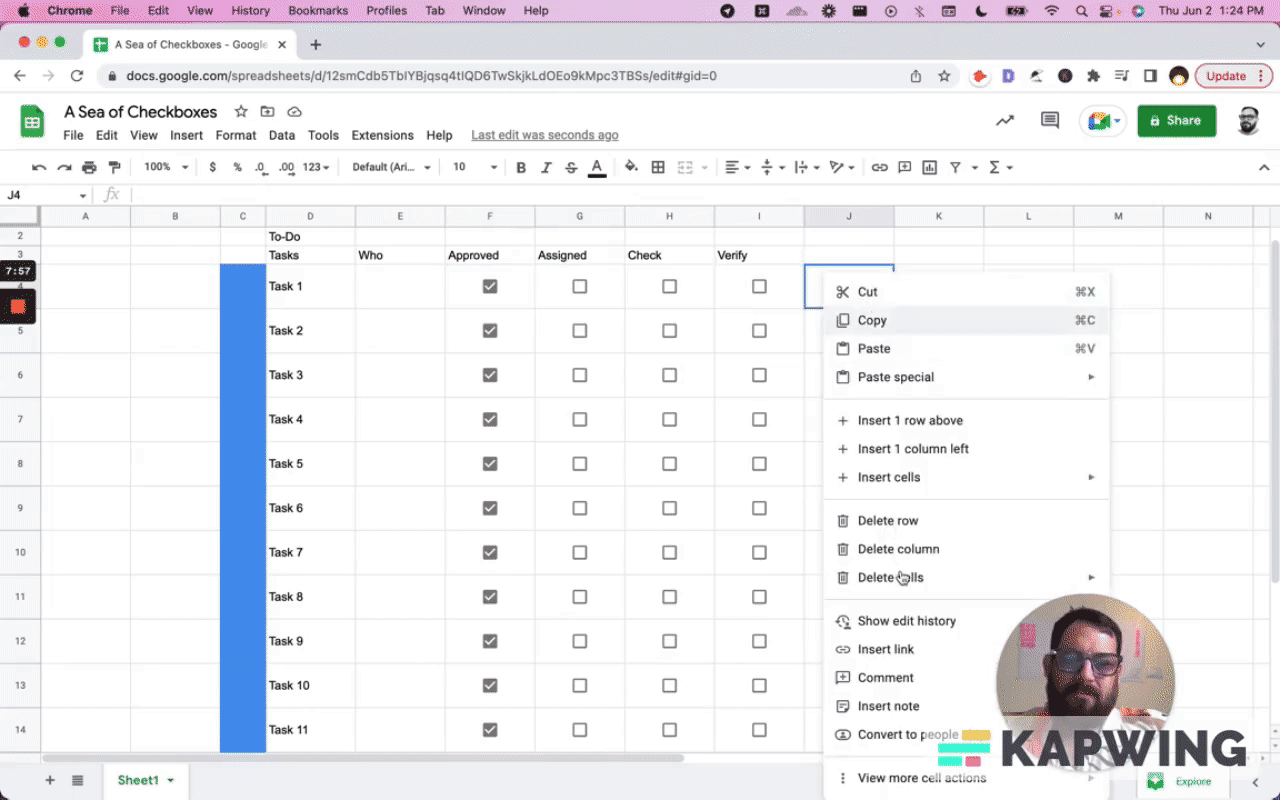
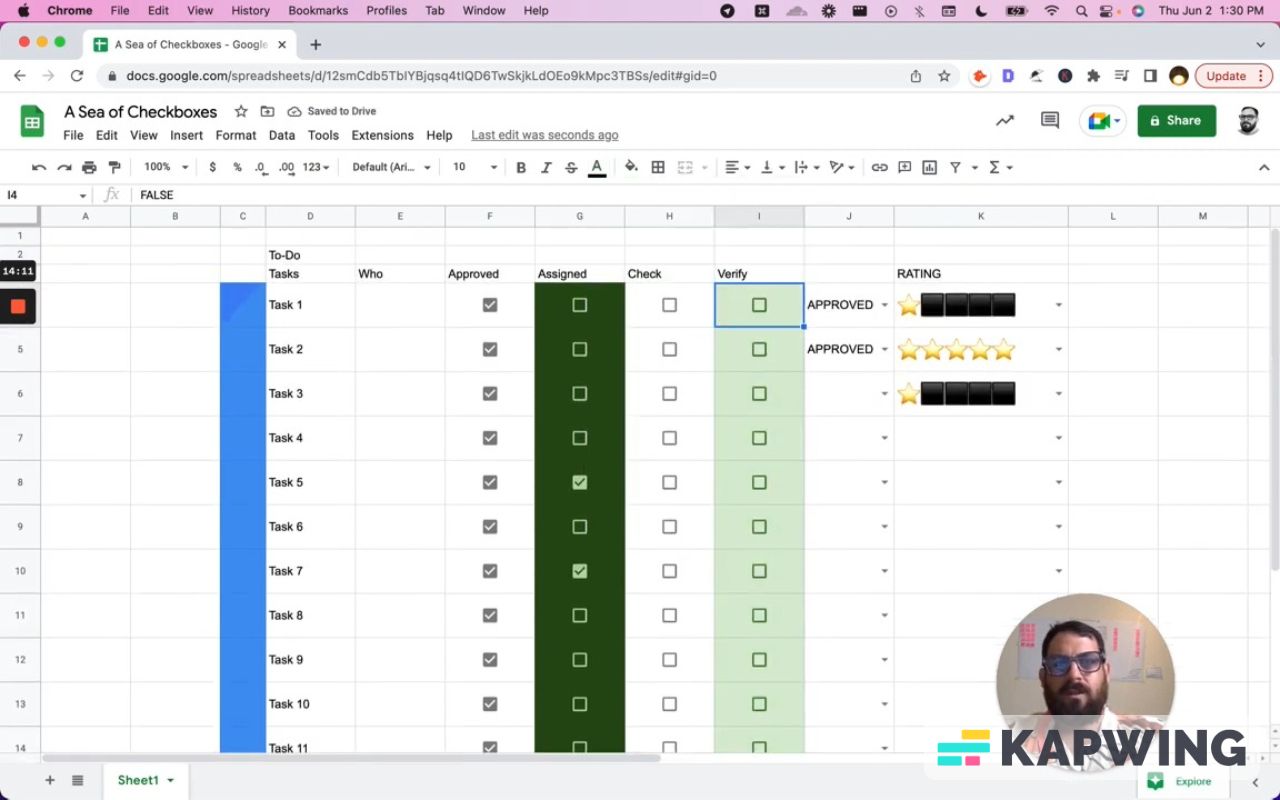
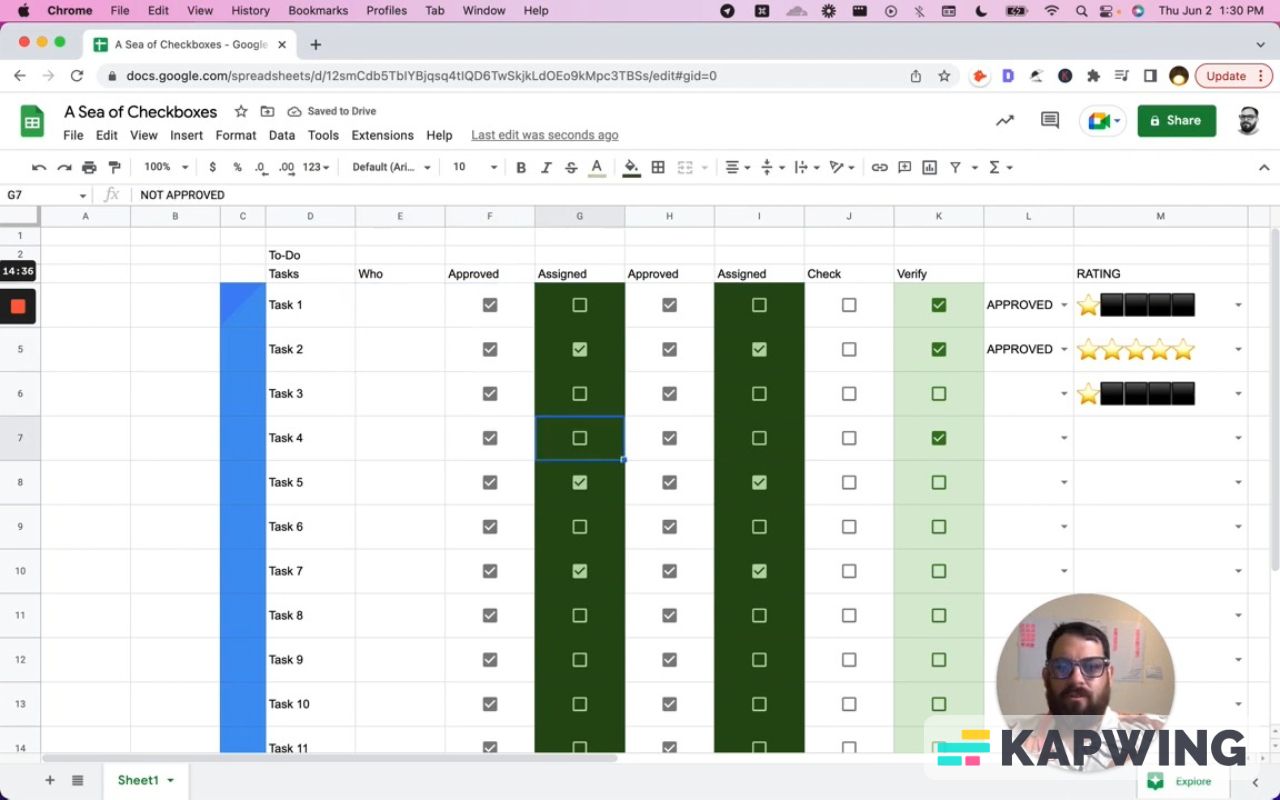
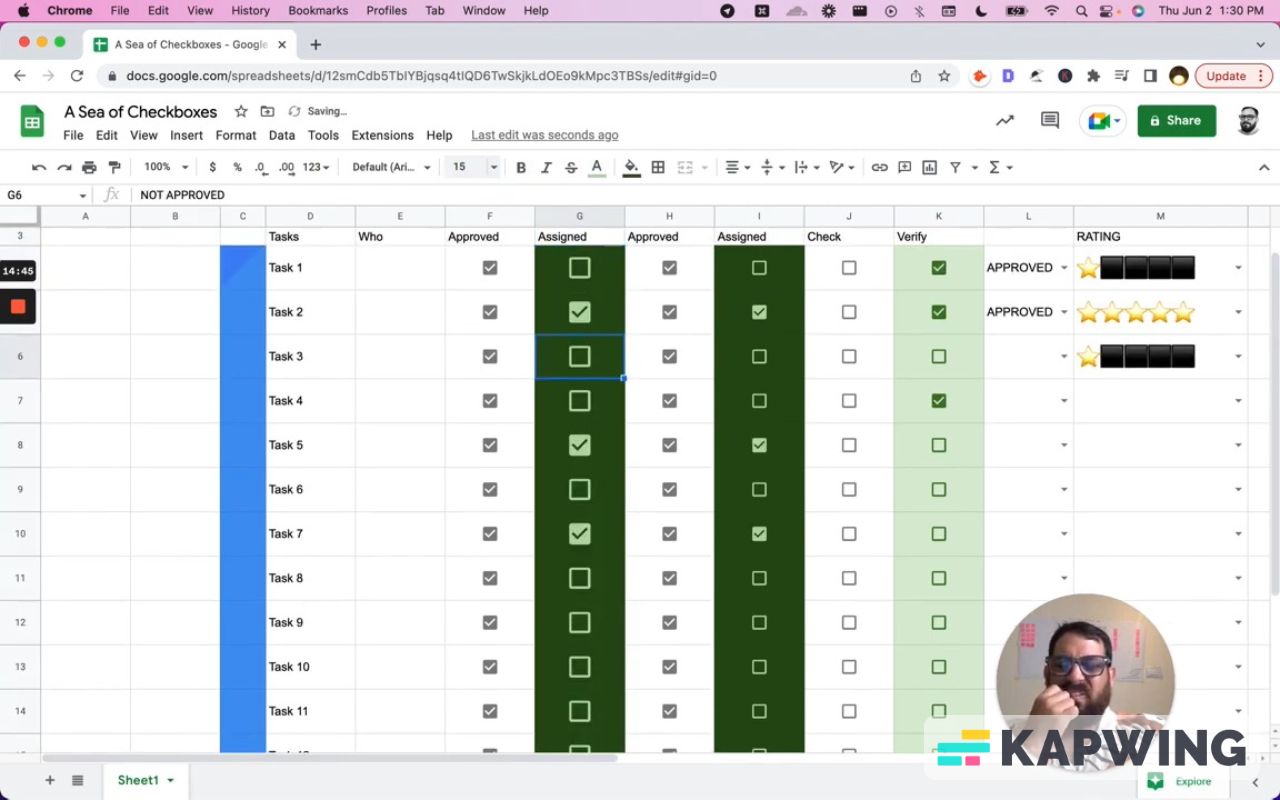
Creating checkboxes for a process
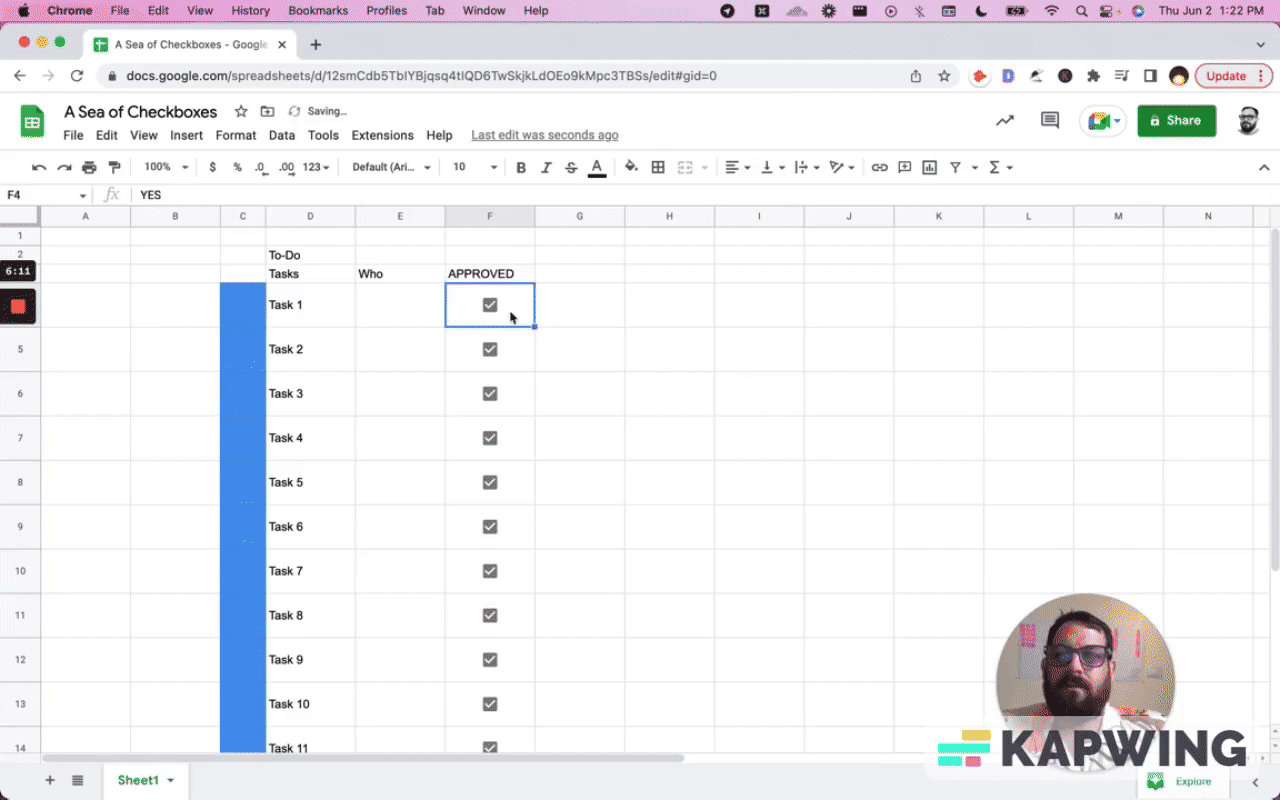
A checkbox only has true or false, yes or no. It’s one or the other. It’s a binary function. But what happens if we need steps in a process or even approvals? We just need to say approved or not approved.
Our checkbox will still say true or false. We can change that.
Again, we’ll go to Data Validation. Then we’ll change the values to approved and not approved.
What if there are three or four things we need to choose from? We need to say:
- We’ve checked it.
- We haven’t approved it but we checked it.
- I’ve assigned this to someone.
- They have not approved it.
There might be multiple steps. Let’s insert more checkboxes for all the columns in these new steps.
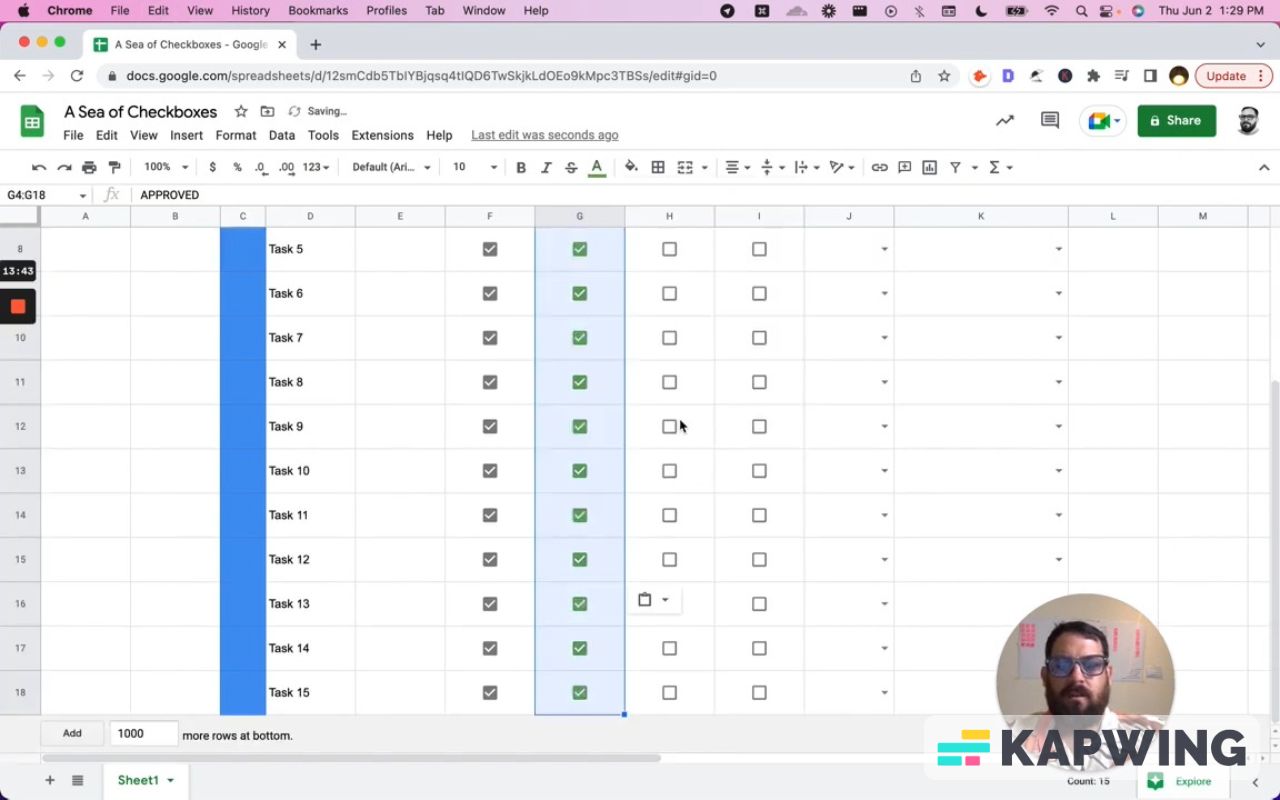
Just like we did here with approved, we can make these all assigned and unassigned, not checked yet and checked, verified and not verified yet.
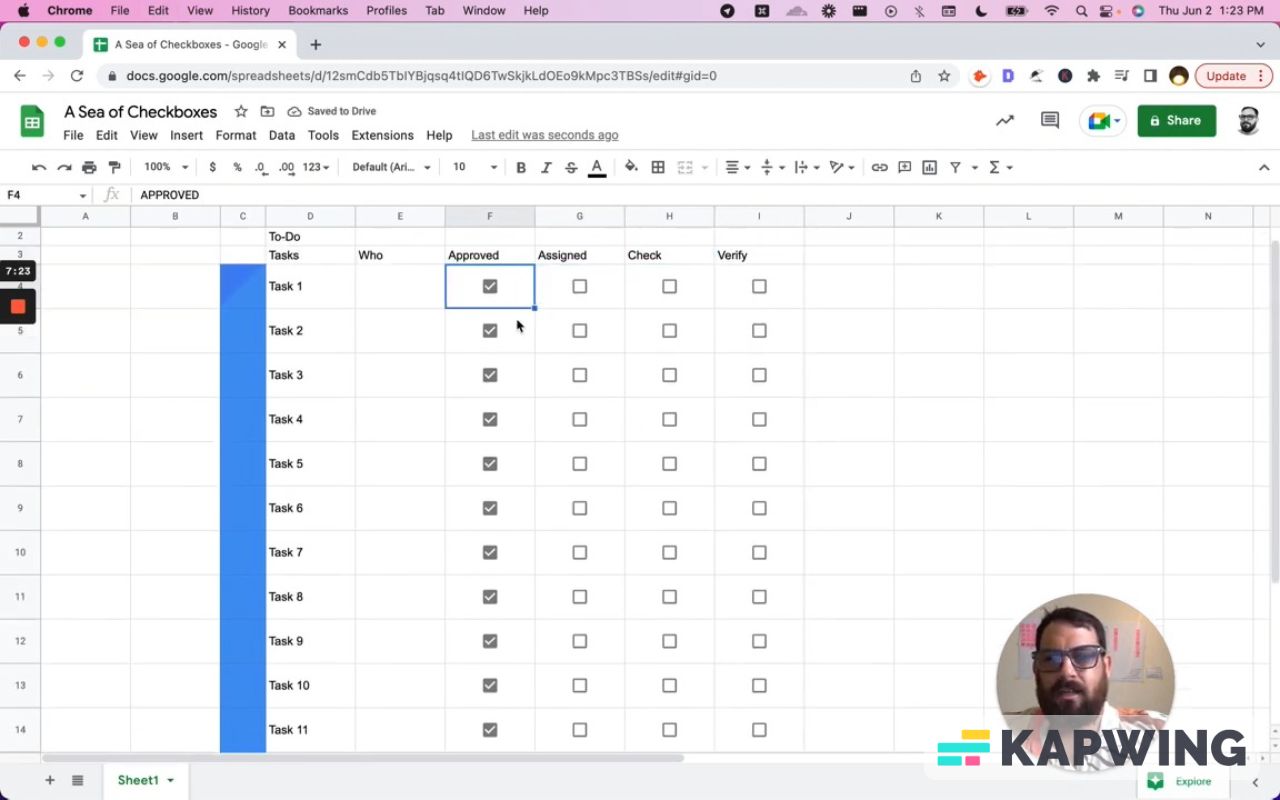
Now we have a sea of check boxes. We have black and white text and we have check boxes that are essentially grayish. It is a nice visual representation.
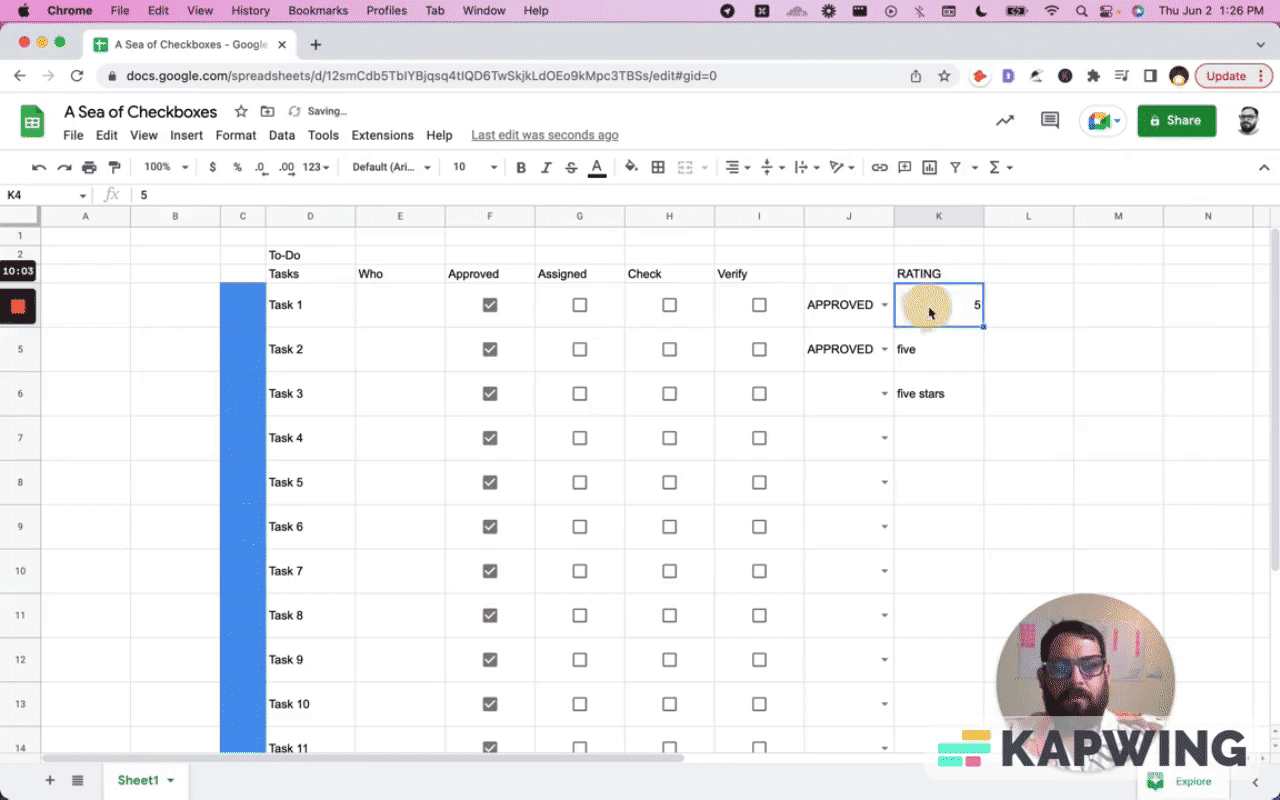
Adding dropdowns
Another option beyond checkboxes is using dropdowns. I've seen this a lot. We can set the true and false values to approved and not yet approved.
What's interesting about this is that there are actually three states: unfilled out, approved, and not yet approved. The unfilled out or blank means I haven’t done anything yet.
Styling your checkboxes
Adding ratings
You don't necessarily have to use text for dropdown menus. You can make use of ratings. I'll show you a couple of cool ways to do this.
Let’s right click on the cell, click “View more cell actions”, Data Validation, and make the changes inside “List of items.”
We can add one star or two stars or more.
What's one more interesting thing we can do here? We have three stars, but it’s not super easy to tell the difference. When we're using Google Sheets, a lot of the information is going to blur together if it looks all the same.
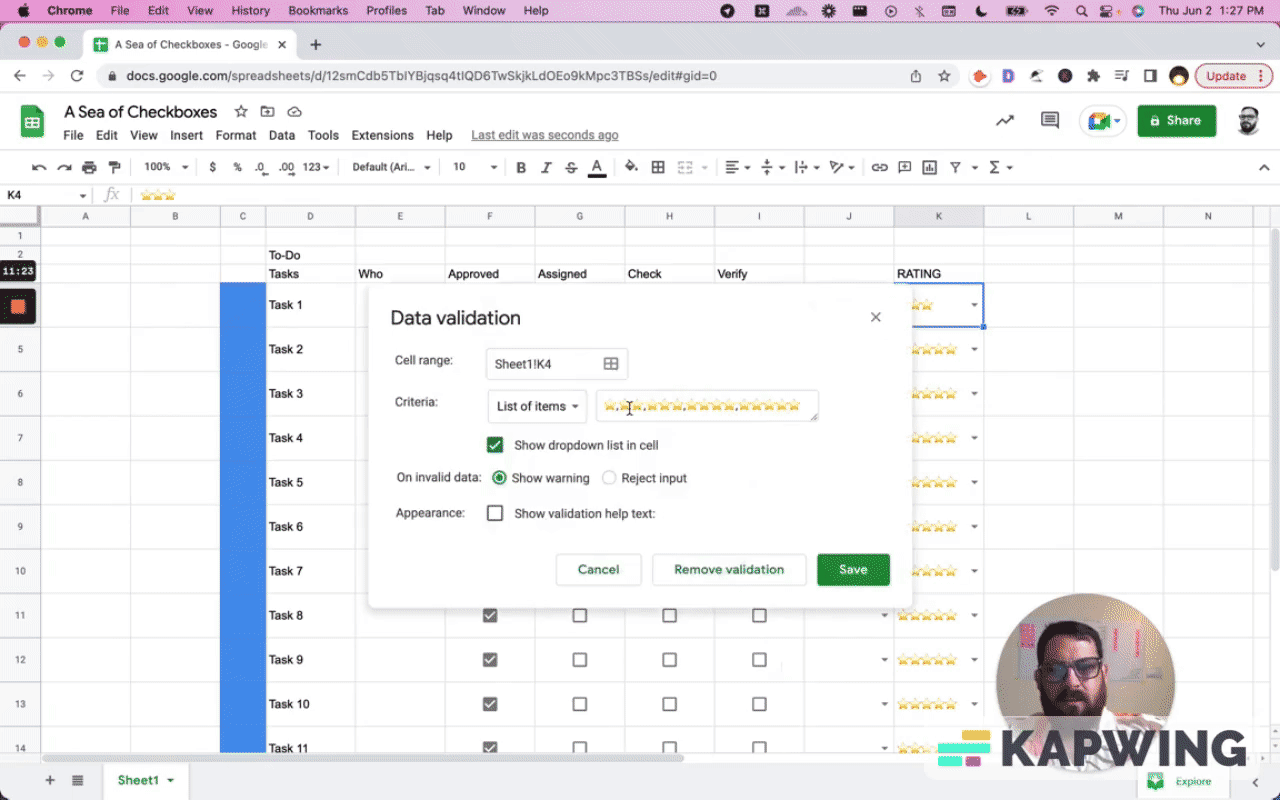
Let’s make use of the black square together with the stars. We want the biggest one possible. It’s going to look like a blank right beside the stars.
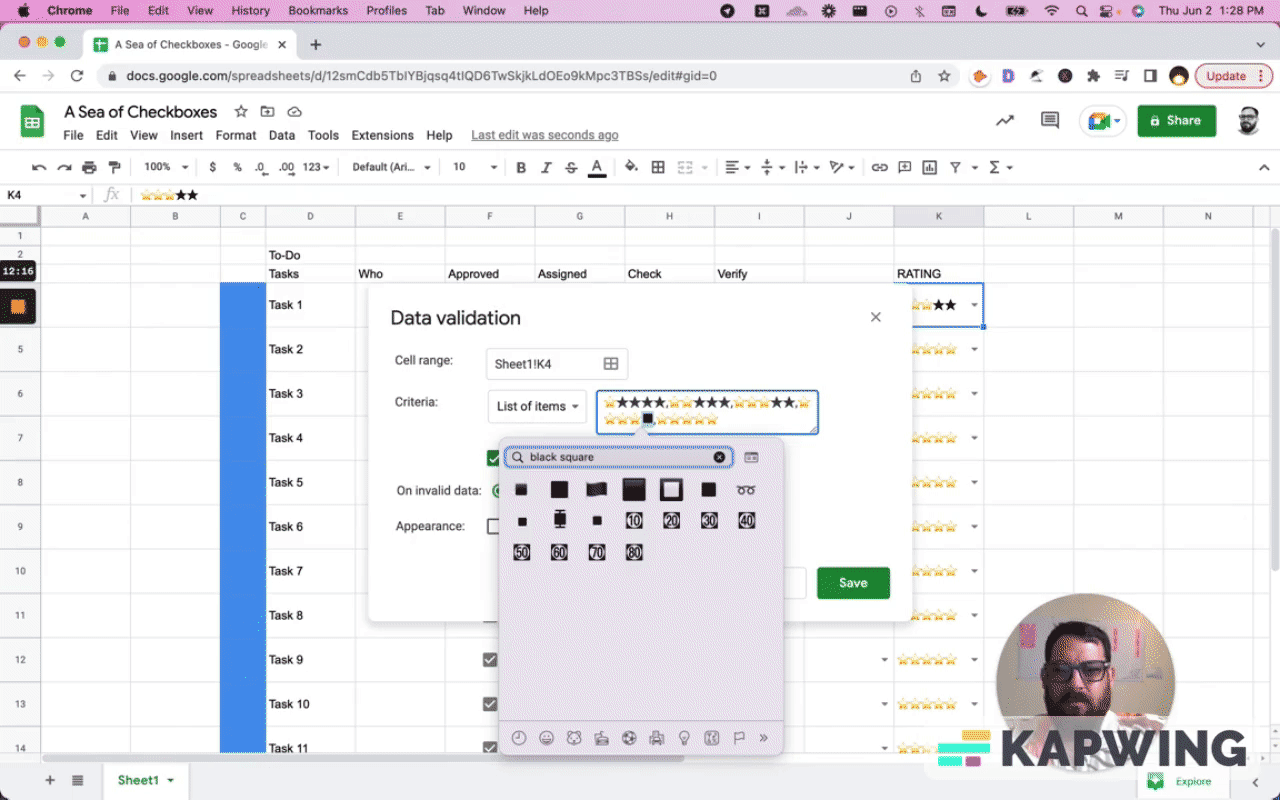
We can always change the font size. I always like rating to be pretty darn big. Let's go with 20. That looks awesome!
We can see very clearly the difference between five stars and one star. Much easier than seeing blanks, especially on this white background.

Make your checkboxes better with colors
All right. Let's go back to these checkboxes and try to make them a little bit better than a sea of black and white.
First off, we can change the color. That's always cool. We can change the color of the green. We have nice green ones.
We can also change the background. That looks so sweet, right? Very different. Sometimes, you want different.
I'm going to just insert two more rows, two more columns, and you can see what they look like with this alternate style. That's what I like to do when I have a sea of the same thing over and over again.
We can also change the size. Maybe one of these is more important than the other one and we want them to be a little bigger.
That is great. That makes a huge difference.
I hope you liked this tutorial and have gotten something out of it. I hope you have a better sheet after reading this. Don't make sheets. Make Better Sheets.
Watch the video for this tutorial:
Learn more about checkboxes and ratings:
Get more Google Sheets Tutorials at BetterSheets.co
We love Google Sheets here. If you love Google Sheets as well, you might want to consider becoming a member of Better Sheets. For only $19/month you can access over 300 Better Sheets tutorials. Learn Apps Script. Design better dashboards. Make your sheets faster and yourself more confident in sheets.