
How to Send Google Forms Entries Automatically with Apps Script
Google Forms provides basic email notifications for form submissions, but enhancing these notifications with detailed summaries can significantly improve productivity and response management.

TL;DR
- Google Forms provides basic email notifications for form submissions, but enhancing these notifications with detailed summaries can significantly improve productivity and response management.
- The guide outlines a step-by-step process to create a Google Form, activate email notifications, and use Google Apps Script to customize the email content, allowing users to receive organized summaries of responses directly in their inbox.
- By implementing a pre-written script, users can automate detailed email notifications that include form submission data and links to the response sheet, streamlining the process of managing and analyzing form responses.
Let's begin
Google Forms is a fantastic tool for collecting data, but its default email notifications leave a lot to be desired. While it’s helpful to know someone has filled out your form, getting a clear, detailed summary of their responses directly in your inbox is a game-changer for productivity.
Imagine receiving an email that not only tells you someone submitted a form but also presents the responses in a clean, easy-to-read format. No more juggling between different tabs or scrolling through endless spreadsheets.
In this guide, we'll walk you through a step-by-step process using Google Apps Script to transform those basic notifications into informative, actionable emails. You'll learn how to effortlessly extract and format form data, making it a breeze to stay on top of your responses.
Creating and Formatting Your Google Form
To kick things off, let's create a basic Google Form that will serve as our starting point. We'll build a simple event registration form to gather essential attendee information.
To keep things straightforward, we'll ask for the basic details like the person's name and occupation.
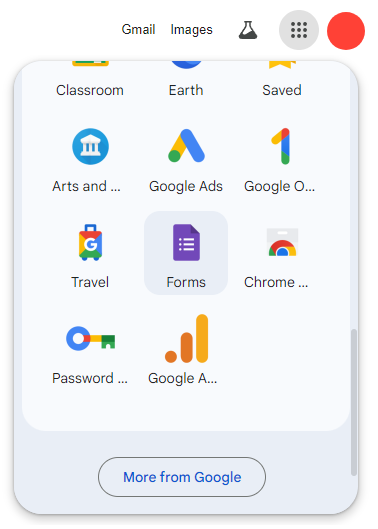
1. Access Google Forms
- Head over to Google Forms (forms.google.com) or find it in your Google Drive.
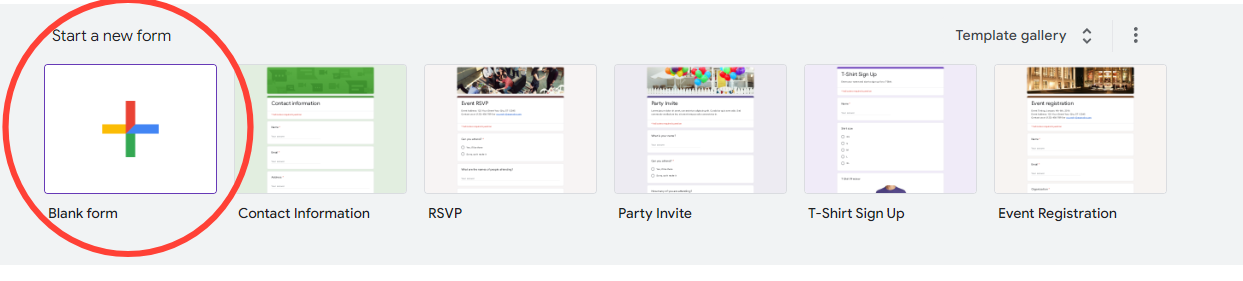
2. Start with a Blank Form
- Click on "Blank" to begin from scratch. You can also use a template for a quicker start.
3. Give Your Form a Title and Description
- Clearly state the purpose of your form in the title.
- Write a concise description to inform users about what to expect.
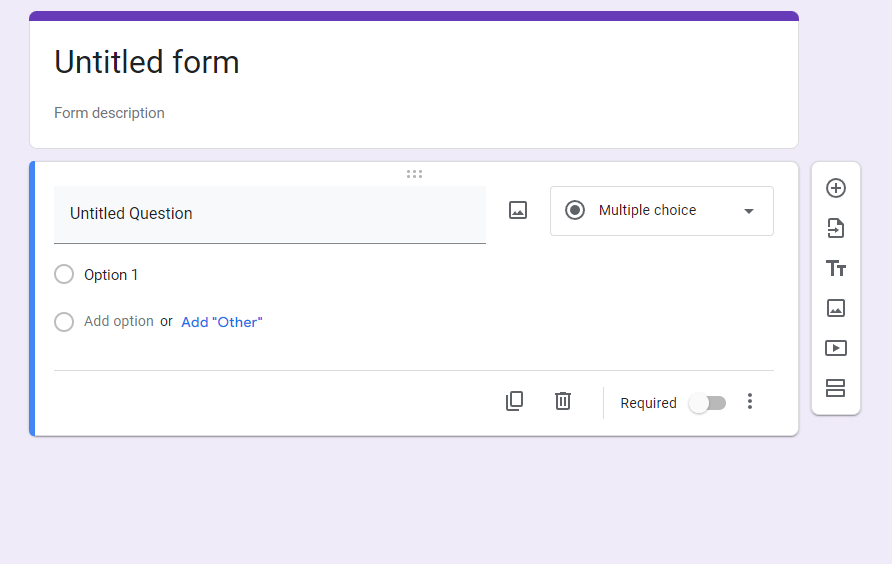
4. Create Questions
- Click the "+" button to add a new question.
- Choose the appropriate question type:
- Short answer: For single-line text responses (e.g., name, email)
- Paragraph: For longer text answers (e.g., feedback)
- Multiple choice: For selecting one option from a list
- Checkbox: For selecting multiple options
- Dropdown: For selecting one option from a list (with a dropdown menu)
- Linear scale: For rating something on a scale (e.g., satisfaction)
- Multiple choice grid: For multiple choice questions with multiple rows
- Date: For collecting dates
- Time: For collecting times
- File upload: For allowing users to upload files

5. Customize Question Settings
- Required: Make a question mandatory by toggling the "Required" button.
- Help text: Provide additional instructions or context for the question.
- Validation: Set rules for acceptable answers (e.g., email format).
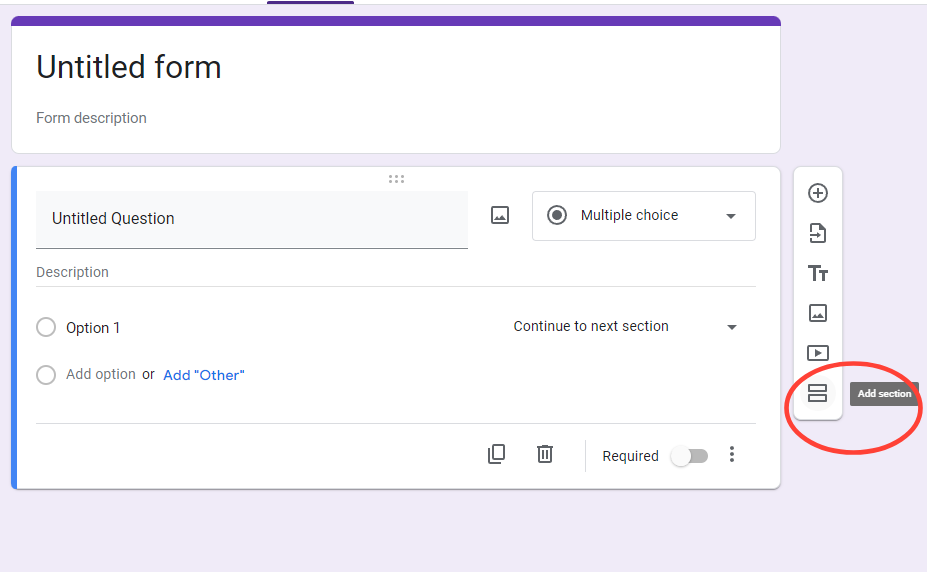
6. Add Sections (Optional)
- Organize your form into sections for better readability.
- Click the "+" button below a question and select "Add section".
7. Format Your Form
- Theme: Choose a color palette and font style from the "Customize theme" tab.
- Question description: Add clear and concise instructions for each question.
- Image: Insert relevant images to enhance visual appeal.
- Question order: Rearrange questions by dragging and dropping.
8. Preview your Form
- Click the "eye" icon to see how your form will look to respondents.
- Make necessary adjustments based on the preview.
9. Test Your Form
- Send the form to yourself or a friend to ensure it functions correctly.
- Check for any errors or inconsistencies.
10. Share Your Form
- Click the "Send" button to share the form via email, link, or embed code.
Feel free to complete steps 5 to 10 at your convenience.
Activating Email Notifications for Form Responses
Staying on top of form submissions is crucial. To ensure you're notified every time someone fills out your form, follow these steps:
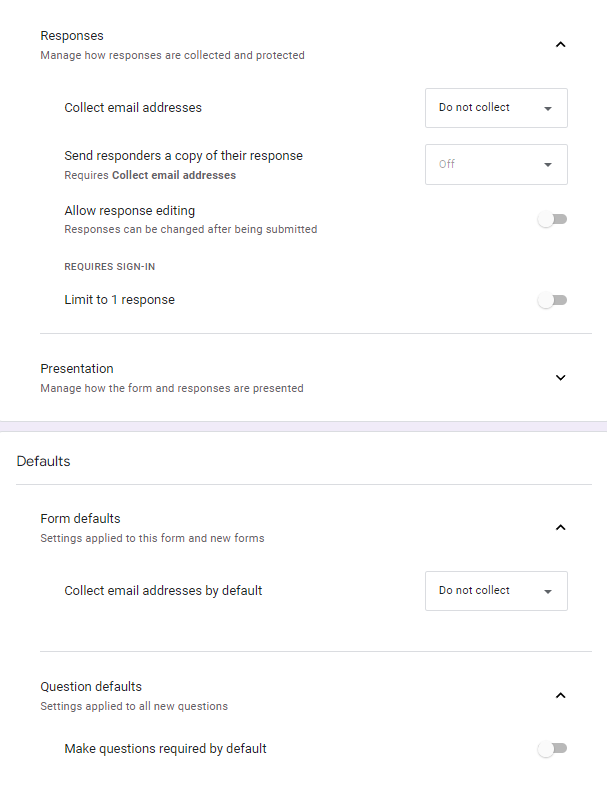
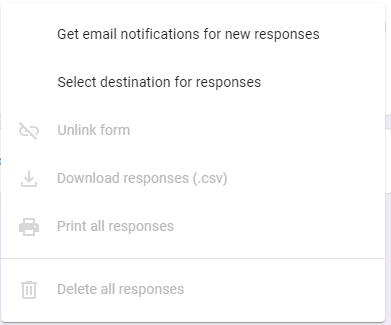
1. Access Form Settings. Open your Google Form and click on the "Responses" tab.
- Enable Email Notifications. Look for the three dots in the top right corner of the "Responses" tab. Click on it and select "Get email notifications for new responses."
Now, you'll receive an email every time someone completes your form. However, these default emails provide limited information. To get a more detailed and actionable overview of responses, let's dive into customizing these notifications using Google Apps Script.
Using Google Apps Script to Enhance Emails
The default email notifications are a good starting point, but wouldn't it be amazing to receive emails with actual details about the submitted responses? With the power of Google Apps Script, we can automate this process and transform those basic notifications into informative summaries.
Here's how to unlock the power of customized email notifications:
1. Locate Your Form Response Sheet. Once someone completes your form, their responses are automatically stored in a connected Google Sheet. Open the Google Sheet that houses your form responses.
2. Unleash the Script Editor. Navigate to the Tools menu in your Google Sheet. Under Script editor, select Apps Script. This opens a dedicated environment for writing code to customize your form behavior.
3. Time to Code (But Don't Worry!). We won't delve into complex coding in this post. Instead, we'll provide a pre-written script that accomplishes the magic.
You can find the script readily available at BetterSheets.co/snippets
function sendEmailsUponFormSubmit(e){
  // Get Form Values
    var formValues = e.namedValues
    var html = '<table>';
    for (Key in formValues) {
    var key = Key;
    var data = formValues[Key];
    html += '<tr><td>' + key + "</td><td> " + data + '</td>';
      };
    html += '</table>';
    var sheetUrl = SpreadsheetApp.getActiveSpreadsheet().getUrl()
    html += "<p> Sheet: " + sheetUrl + "</p>"
    var newDate = Utilities.formatDate(new Date(), "GMT-5", "MM/dd/yyyy-HH:mm:ss")
    var emailSubject = "Form Submitted: "+ newDate
    var sheetOwner = SpreadsheetApp.getActiveSpreadsheet().getOwner().getEmail()

    Logger.log(html)
    // Send Emails
      MailApp.sendEmail({
        to:  sheetOwner,
        subject: emailSubject,
        htmlBody: html
      })
}
4. Activate Your Script. Save the script and then run the createTrigger function. This sets up the automation to send detailed emails whenever a new form response is submitted.
By following these steps and incorporating the provided script, you'll be well on your way to receiving insightful and actionable email notifications for your Google Forms.
Adding Custom Information
Want to include extra details in your notification emails, like a link to the form responses sheet? You can easily customize the script to do this.
- Modify the Script. Add a line of code to the script to include the sheet's URL in the email body.
javascript
function sendEmail() {
    var formResponses = FormApp.getActiveForm().getResponses();
    var formResponse = formResponses[formResponses.length - 1];
    var itemResponses = formResponse.getItemResponses();
    var sheetUrl = SpreadsheetApp.getActiveSpreadsheet().getUrl();

    var htmlBody = '<table>';
    for (var i = 0; i < itemResponses.length; i++) {
        htmlBody += '<tr><td>' + itemResponses[i].getItem().getTitle() + '</td><td>' + itemResponses[i].getResponse() + '</td></tr>';
    }
    htmlBody += '</table>';
    htmlBody += '<p>Form Responses can be viewed here: <a href="' + sheetUrl + '">' + sheetUrl + '</a></p>';

    var email = Session.getActiveUser().getEmail();
    var subject = 'Form Submitted: ' + new Date();
    MailApp.sendEmail({
        to: email,
        subject: subject,
        htmlBody: htmlBody
    });
}
Testing and Verifying
Once your script and trigger are set up, it's time to test your new notification system. Submit a test response to your Google Form. You should then receive an email with a detailed summary of the submission.
This email will include a timestamp, each question and its corresponding answer, and a handy link that takes you directly to the Google Sheet for further reference.
Flexibility and Further Customization
This method offers remarkable flexibility. You can expand your form with new questions without the need to constantly modify the script. For instance, adding a query like "How are you today?" with multiple-choice options will be seamlessly integrated into the email notification. This adaptability makes it a powerful tool for managing form responses efficiently.
In essence, this script provides a dynamic solution for handling form responses. It not only automates the notification process but also adapts to changes in your form structure. This ensures that you always have the most up-to-date information at your fingertips, delivered directly to your inbox.
Conclusion
Google Apps Script can revolutionize the way you manage Google Form responses. By automating the creation of detailed email notifications, you'll save valuable time and effort compared to manually checking form submissions.
Enjoy the benefits of having neatly formatted, instantly accessible form data delivered directly to your inbox. This streamlined approach empowers you to focus on analyzing and utilizing the information, rather than spending time organizing it.
I hope this guide has empowered you to take control of your Google Form responses! By automating the notification process and enhancing email content, you can save time and make better use of your data.
Want to dive deeper into Google Apps Script and form optimization? Check out:

Happy form handling!
Answer This Now!
What is the primary benefit of using Google Apps Script with Google Forms as described in the article?
A) It allows users to create more complex forms with advanced question types.
B) It automates the process of sending detailed email notifications with form responses.
C) It enables users to share forms more easily through social media.
D) It provides templates for creating visually appealing forms.
Use Cases of Google Forms and Apps Script
1. Event registration: Collect attendee information for workshops or conferences.
2. Feedback collection: Gather participant feedback after events or meetings.
3. Customer satisfaction surveys: Measure customer satisfaction and gather insights.
4. Job application forms: Streamline the application process for potential candidates.
5. RSVP for events: Manage guest lists and track responses for parties or gatherings.
6. Product order forms: Simplify the ordering process for products or services.
7. Volunteer sign-up: Organize volunteers for community events or initiatives.
8. Course enrollment: Register students for classes or training sessions.
9. Contest entries: Collect entries for competitions or giveaways.
10. Research surveys: Gather data for academic or market research projects.