What Can You Automate in Google Sheets? Every single trigger available to Google Sheet users
Make your data tasks simpler & efficient. Discover the power of automation in Google Sheets with a comprehensive guide that covers everything from triggers to scripts.
In this tutorial, we're going talk about what you can automate in Google Sheets. Specifically, we're going to talk about triggers because there is a bit of a difference between semi-auto and automation.
Semi automation
Semi auto happens a lot in Google Sheets, and actually that's my preferred way to do automations.
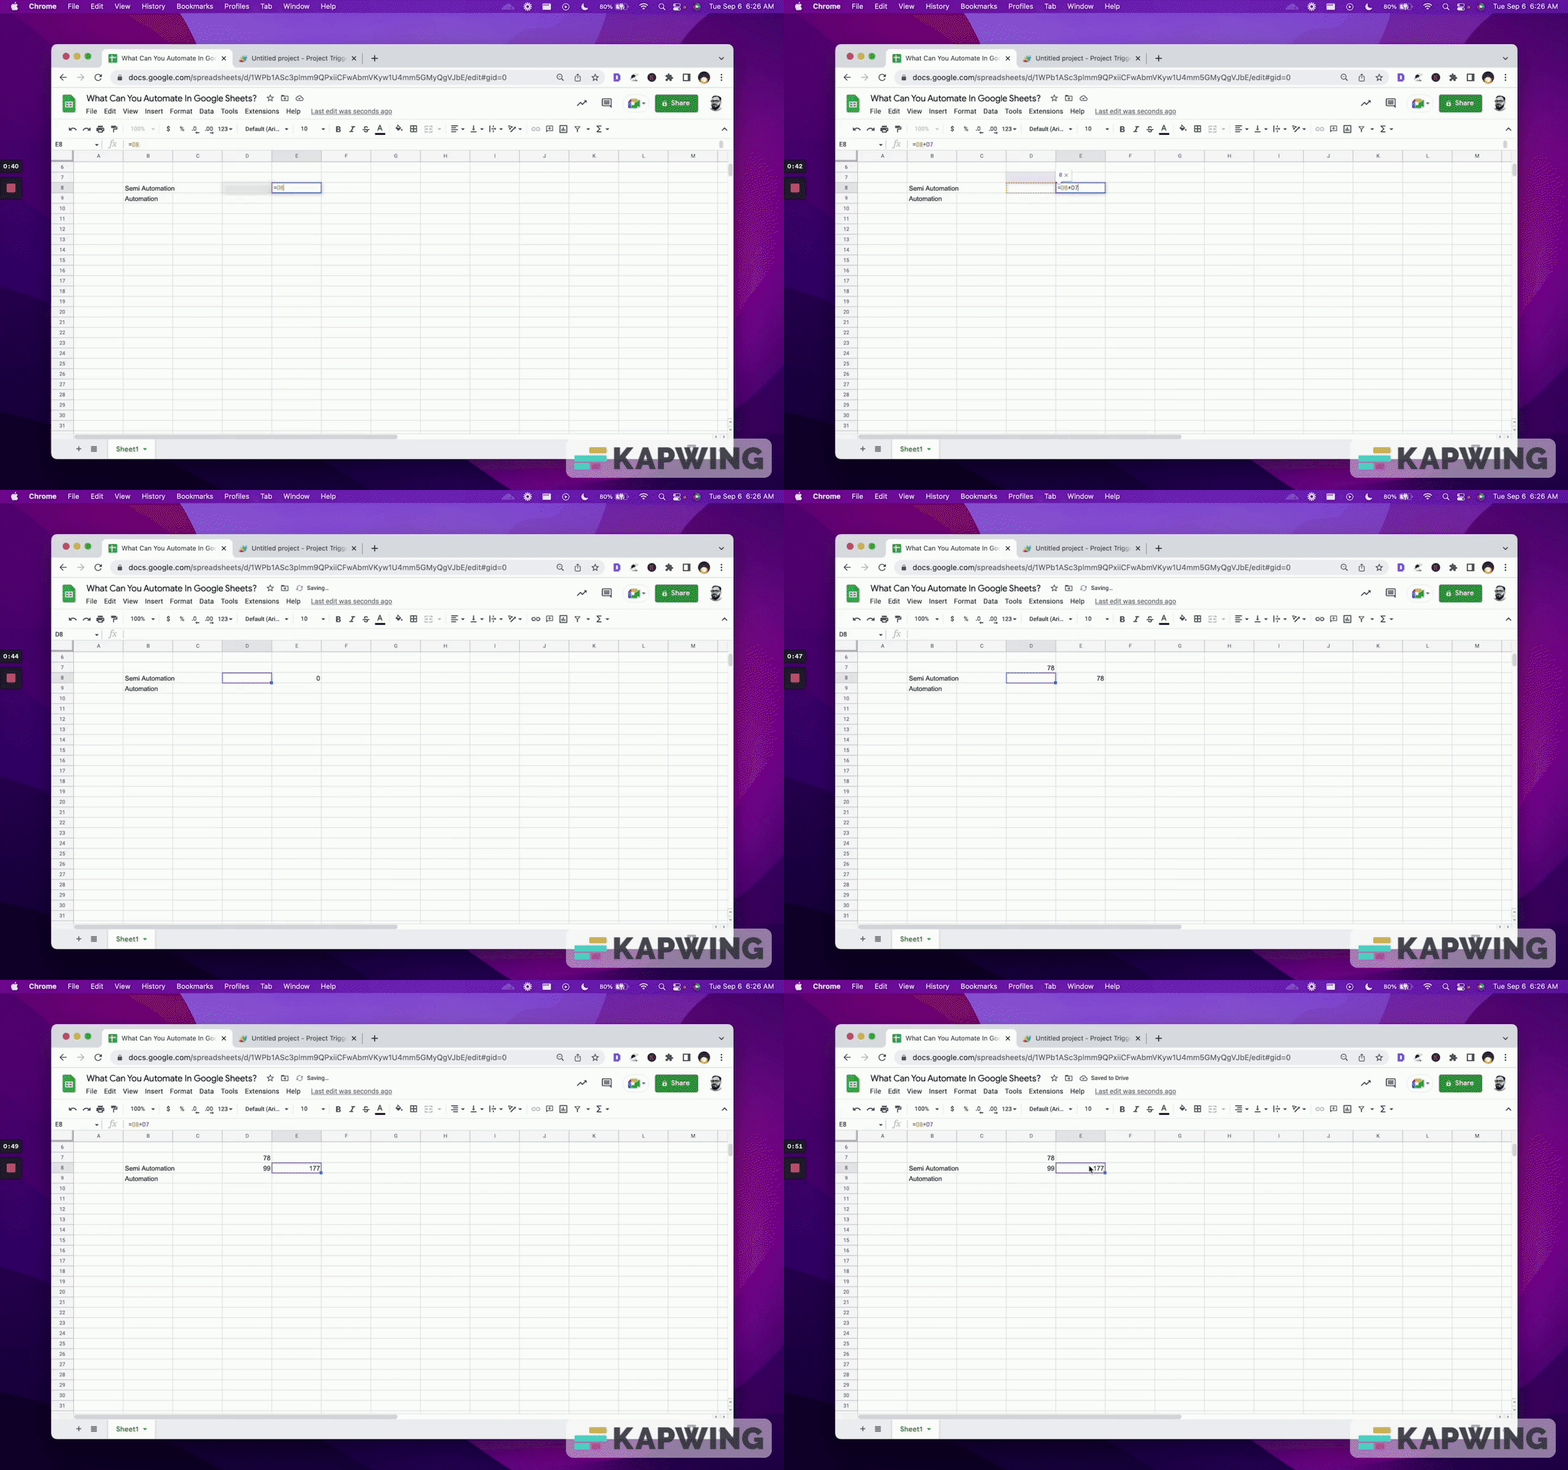
What you might consider automations in Google Sheets is when some formulas automatically do something based on somebody's input.
If we say =D8+D7, we have this total here, which is 0.
And then we type 78 and 99 in D7 and D8. We have this result, which is 177.
I call this semi automation. It means it’s not necessarily triggered by the user and creates or generates something else. It’s already here and generates for you.
Semi automation also includes scripts that we might build.
Automation
There’s a fairly broad and wide amount of things you can automate in Google Sheets, but if you have not yet ever written a script or done Apps Script, this is a little bit of a next step after just learning how to create a script.
Why do people write scripts? It might be because people will then be able to use that script over and over and over again based on these triggers, which we'll talk about.
So if you've never written app script before, go ahead and take a look at my course, Learn to Code in Google Sheets | Intro to Scripting.
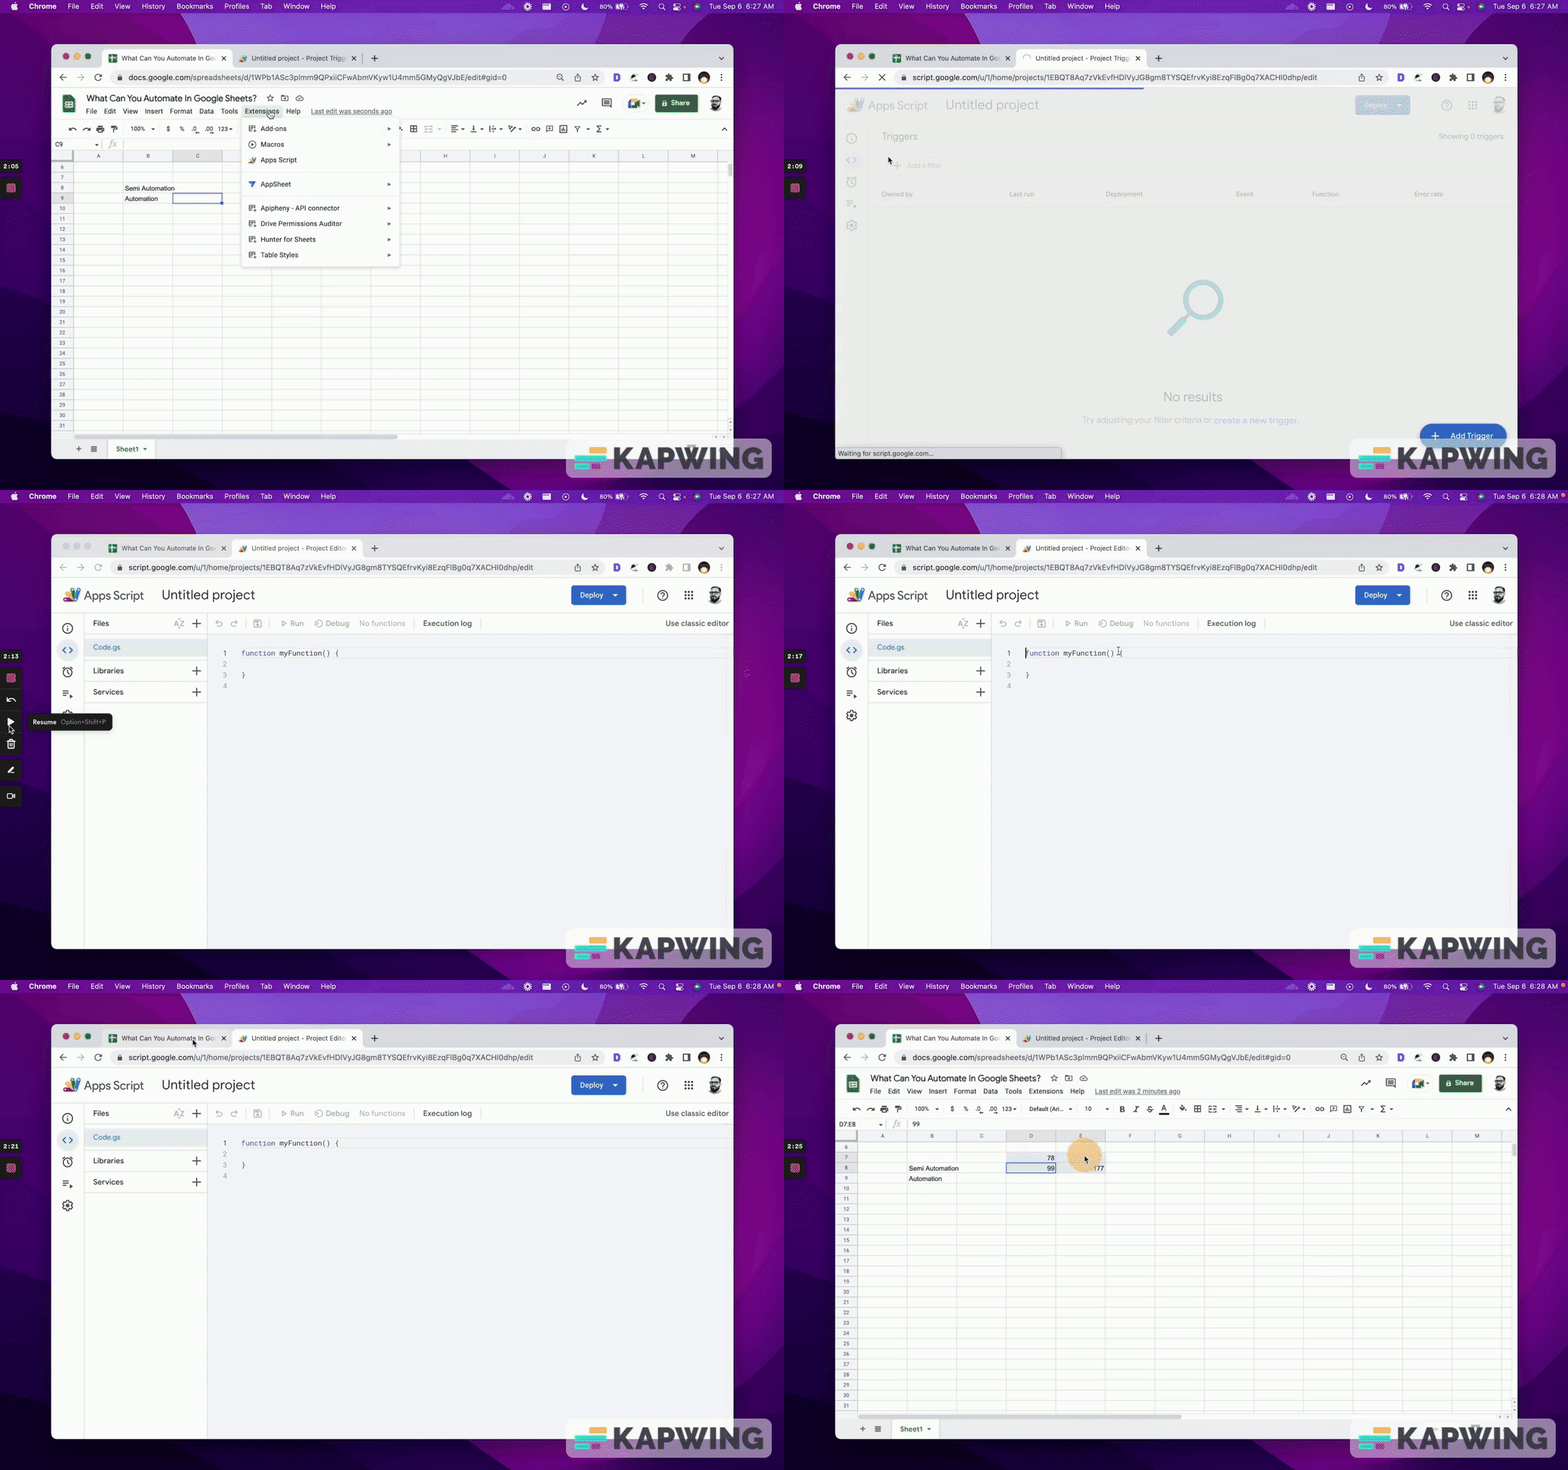
It's basically going to Extensions tab and going to Apps Script and it'll take you to an editor.
I haven't had a script written yet, but we will in a moment. Right now, it's the basic thing that shows up in Google Script. We're not going to change it yet because I want show you what will happen if we try to automate something and we have nothing.
If we automate things, we want it to happen on a regular basis. That's where triggers come in. Let’s create one right now.
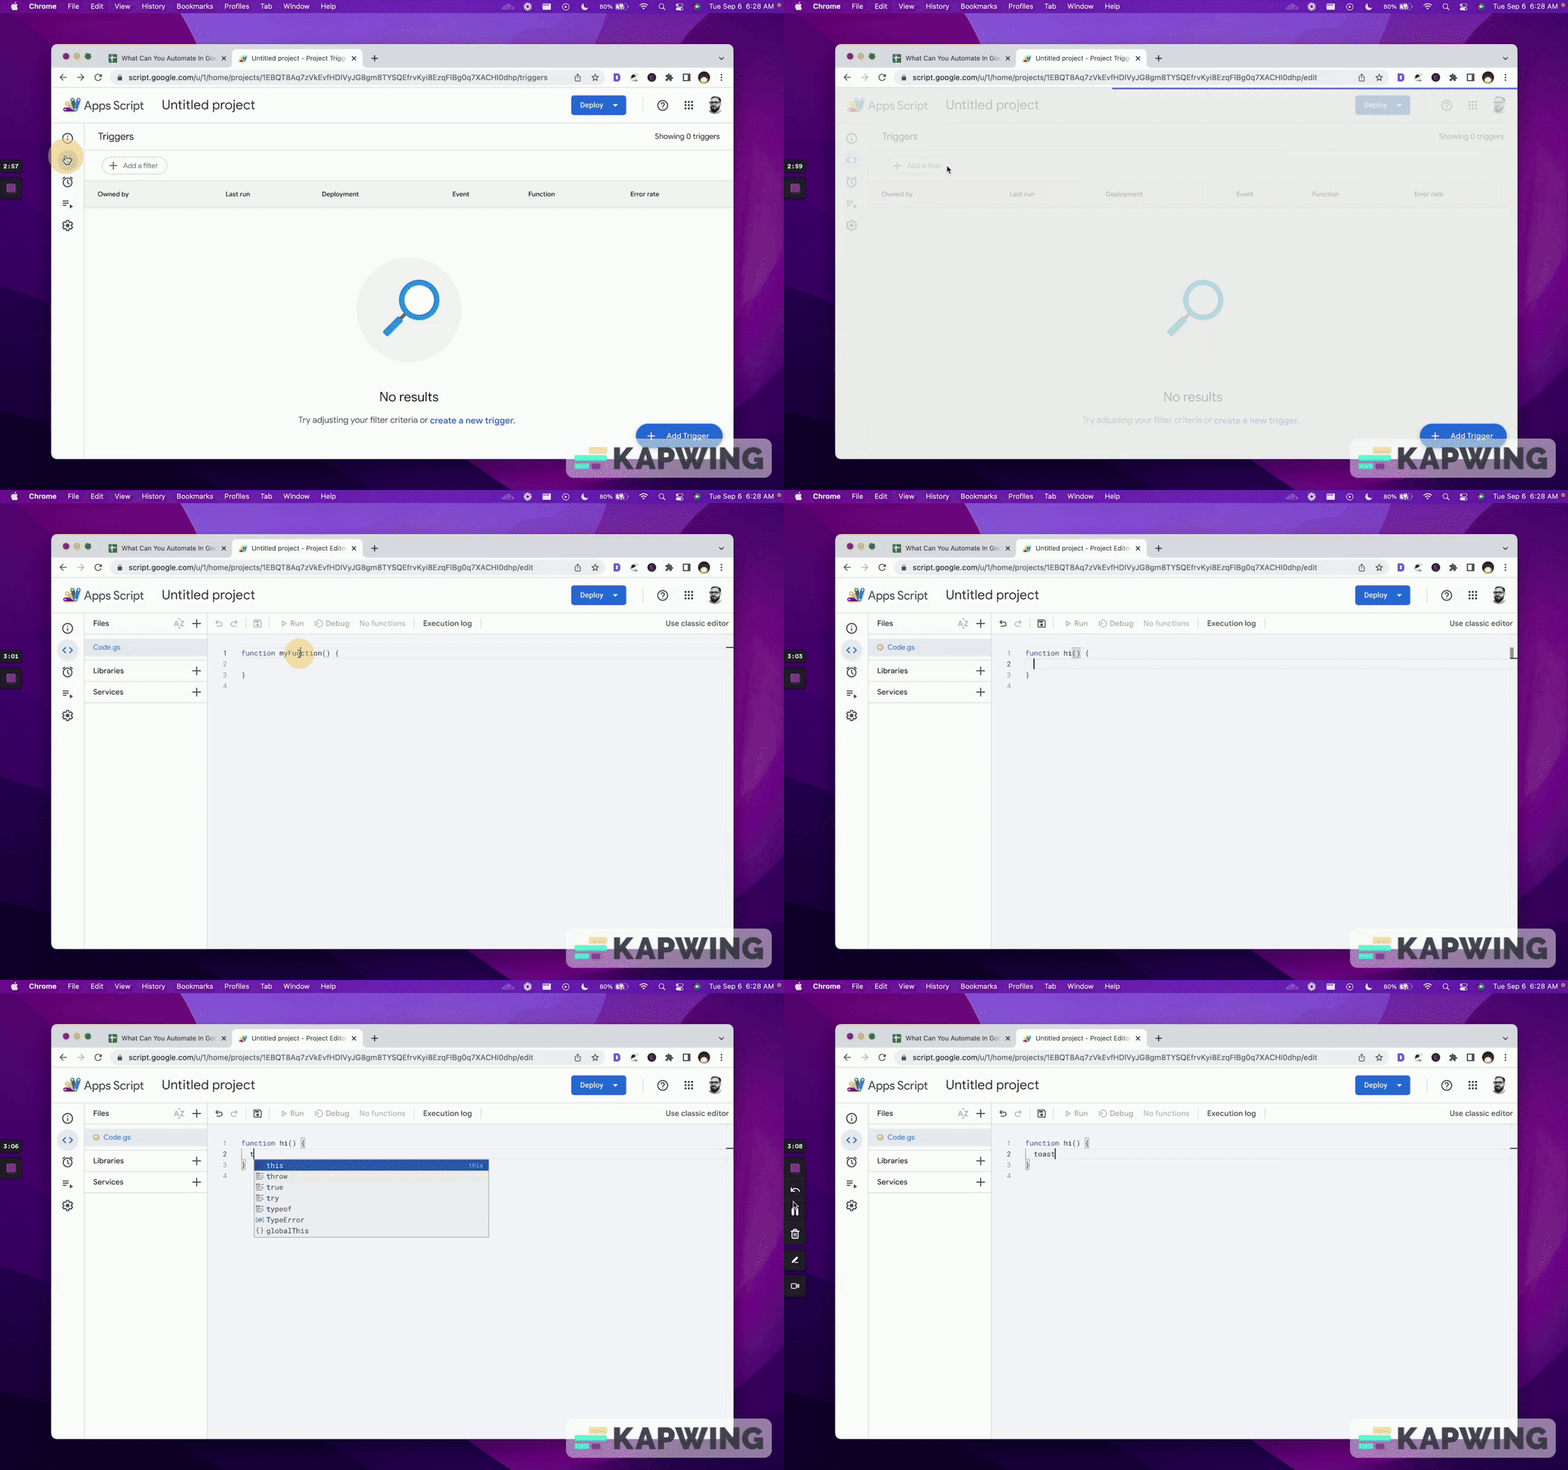
So we have Apps Script open. On the sidebar, click on “Triggers” and then click on the blue button on the bottom right, “Add Trigger.”
We have a bunch of options, but as you can see at the bottom, it tells you that you cannot create a trigger without a target function. So we have to add functions.
We must have something written in here, which we’ll do now.
Just rename “myFunction” to “hi” and then we’re going to type in the toast on the next line.
Function hi() {
SpreadsheetApp.getActive().toast(“Message”);
}
So this is it. This is the entire thing we want to create, and it's just a message that will show up in our sheet.
Let’s change “Message” to “Hello!” and save it.
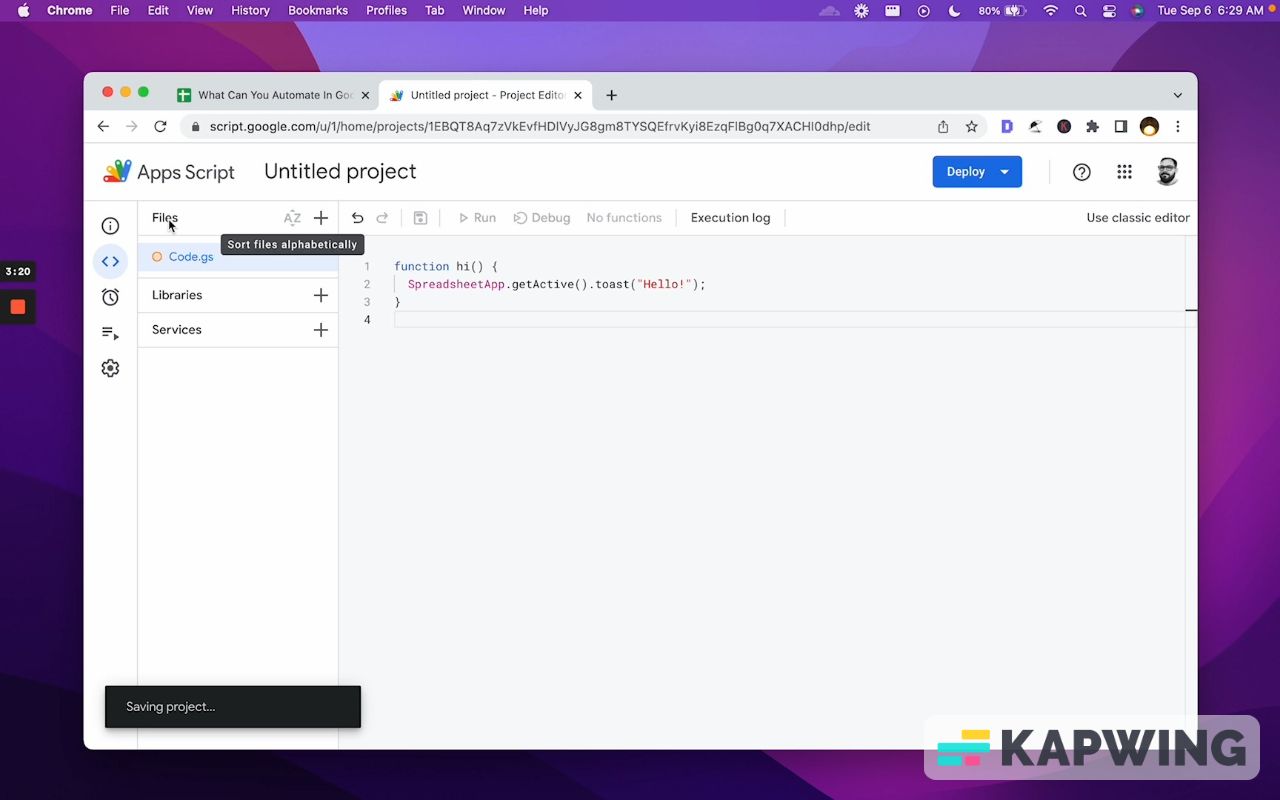
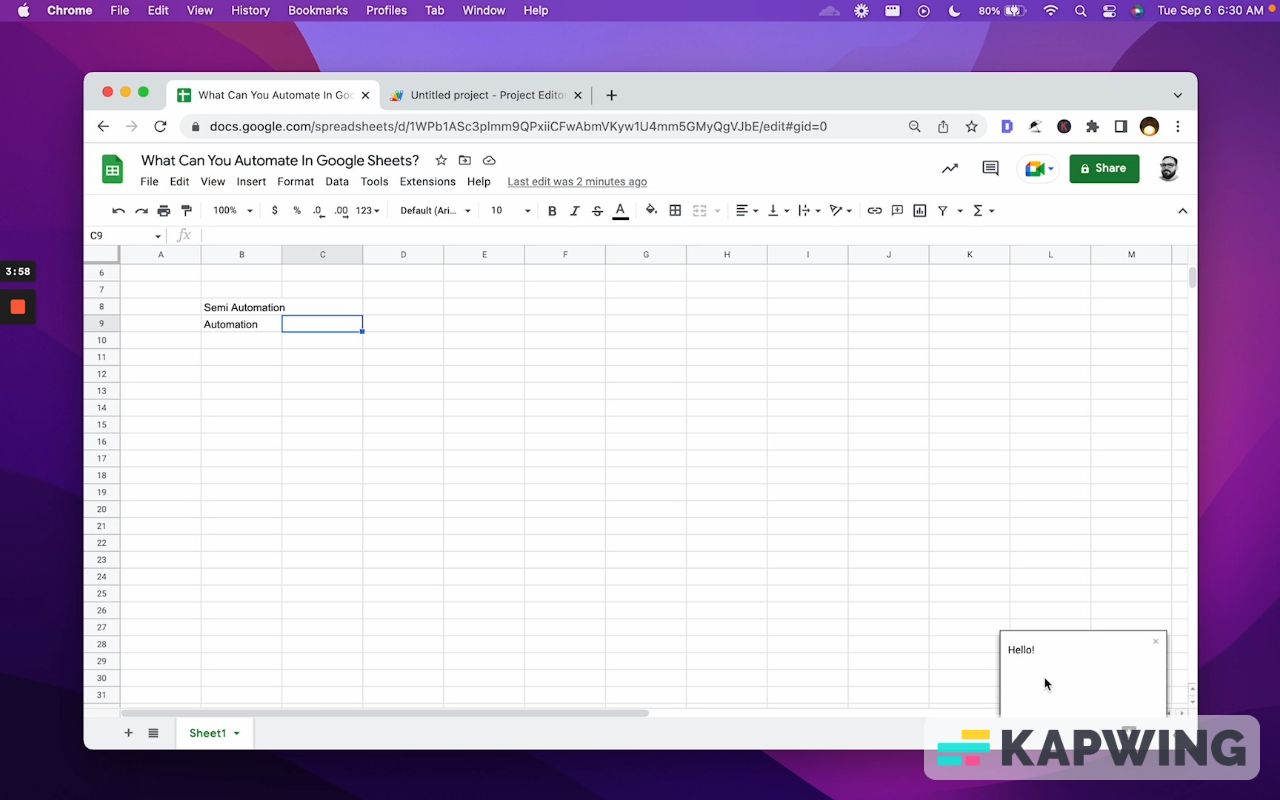
This function, if we run it, is just going to show up a little message on the bottom right that says “Hello!”
Here on the bottom right says "Hello!" and that's it.
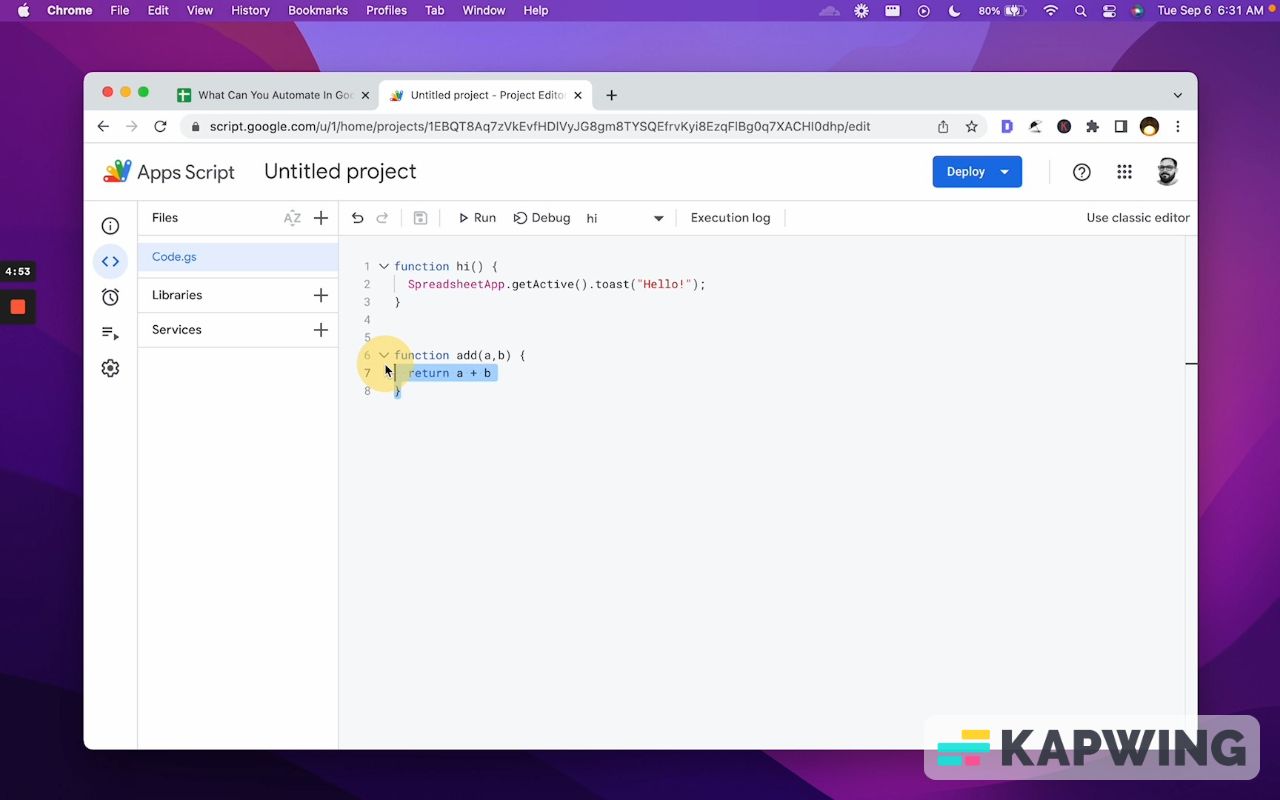
There's a few other ways to run a script. We can do another script, like a function:
function add(a,b) {
return a + b
}
Save that and return to our sheet. Type this formula:
=add(1,3)Now we should see four when we enter that formula.
This is a function that's based inside of a cell:
And this is a function that goes to the spreadsheet and says, “Hey, do something in the spreadsheet.”
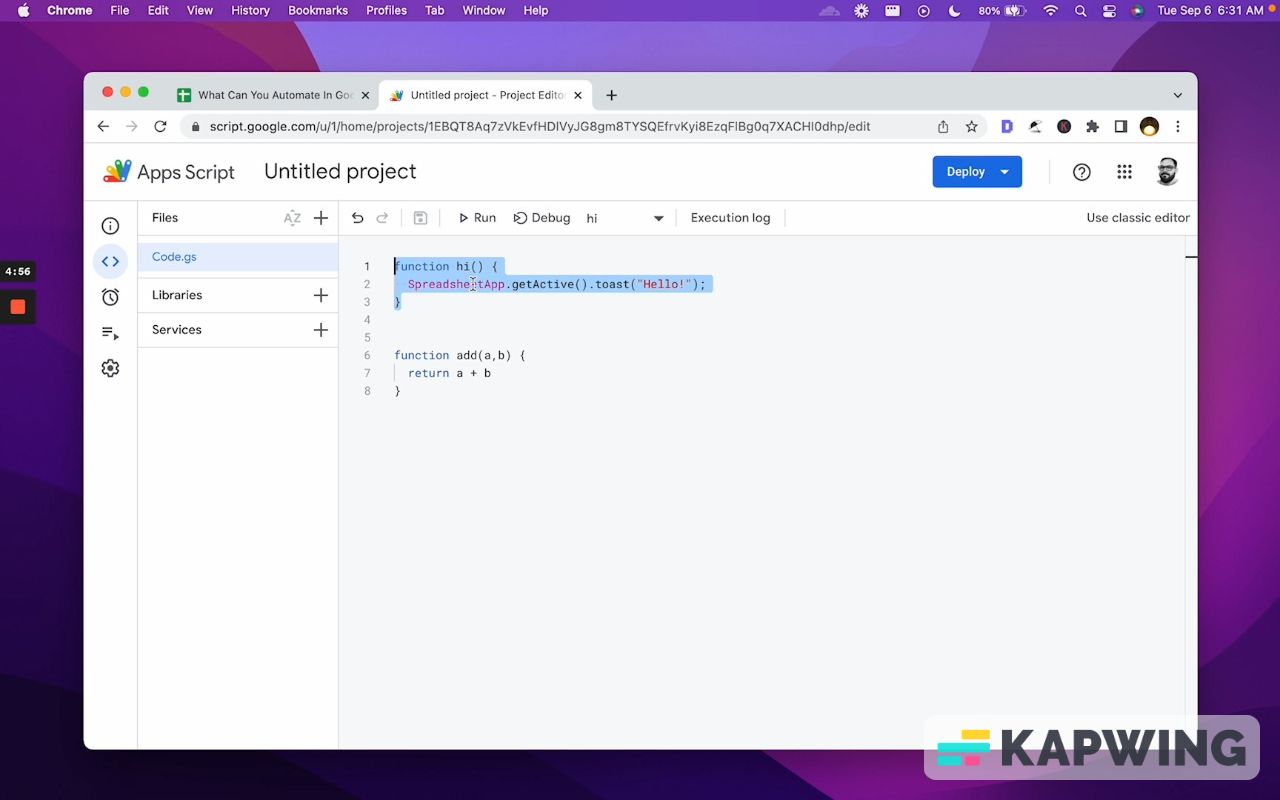
They’re a little bit different but they’re all functions.
We want to create a trigger but we don't want to create a trigger of adding two numbers, because we don't have two numbers. We want to create a trigger of this message that says, “Hello!”
Maybe it's like a reminder that the hour has gone by. Maybe it helps remind us that we need to take a break during Google Sheet spreadsheet making.
Remember, we had this error at the bottom. It said we needed a function, and now we don't have that error. We have now options of which function to run. We must select the one we want to run.
- Choose which function to run: hi
- Choose which deployment should run: Head
- Select event source: Time-driven
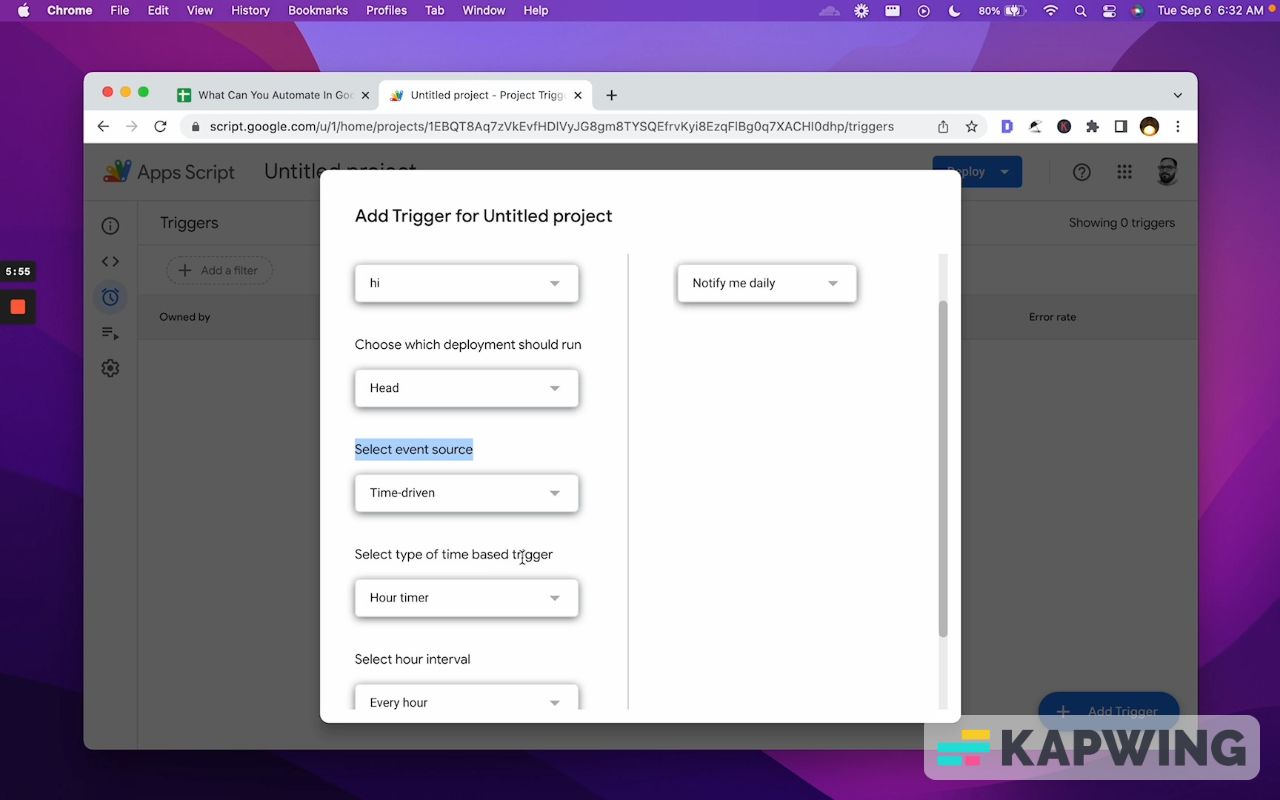
Select event source in Trigger in Google Sheets
“Select event source” is where the bulk of this tutorial is going to be spent. It's gonna be time driven and right when we say time driven, we have this type of time-based triggers.
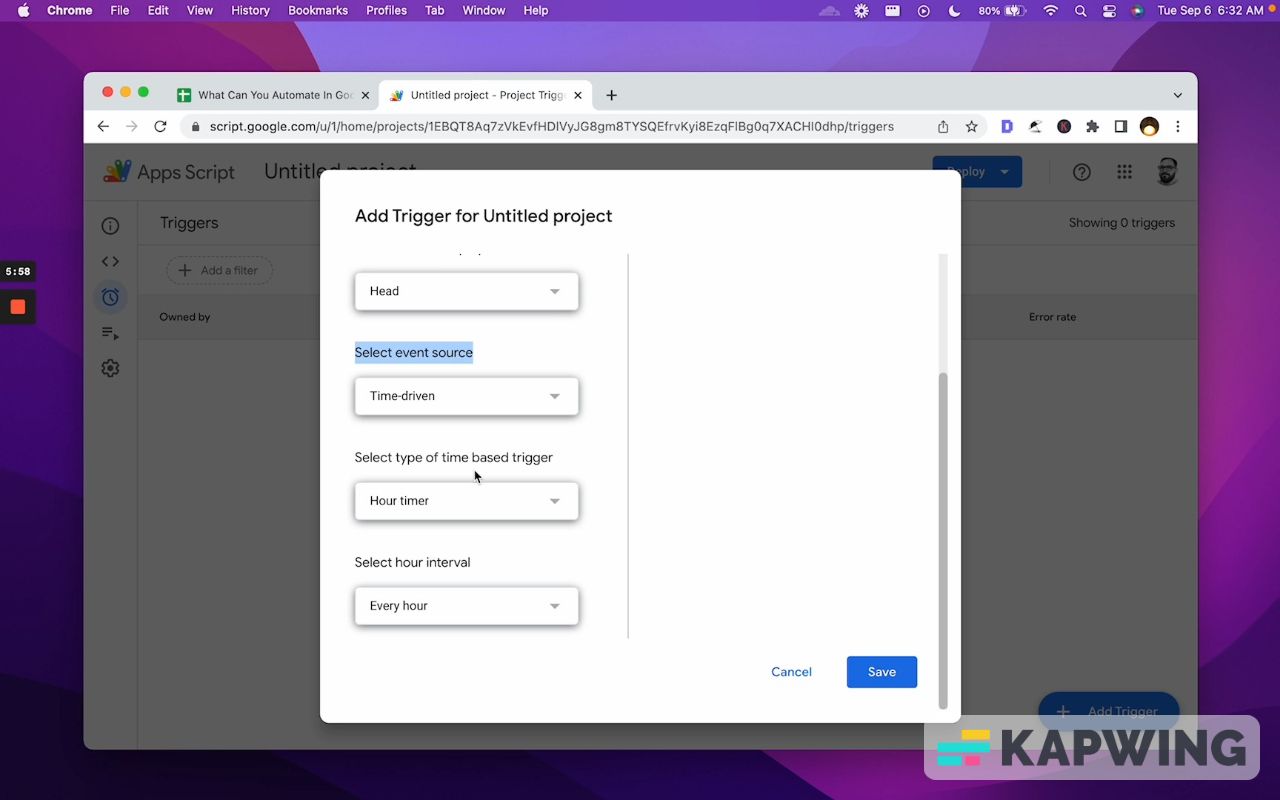
There is “From spreadsheet” and we can have these different options.
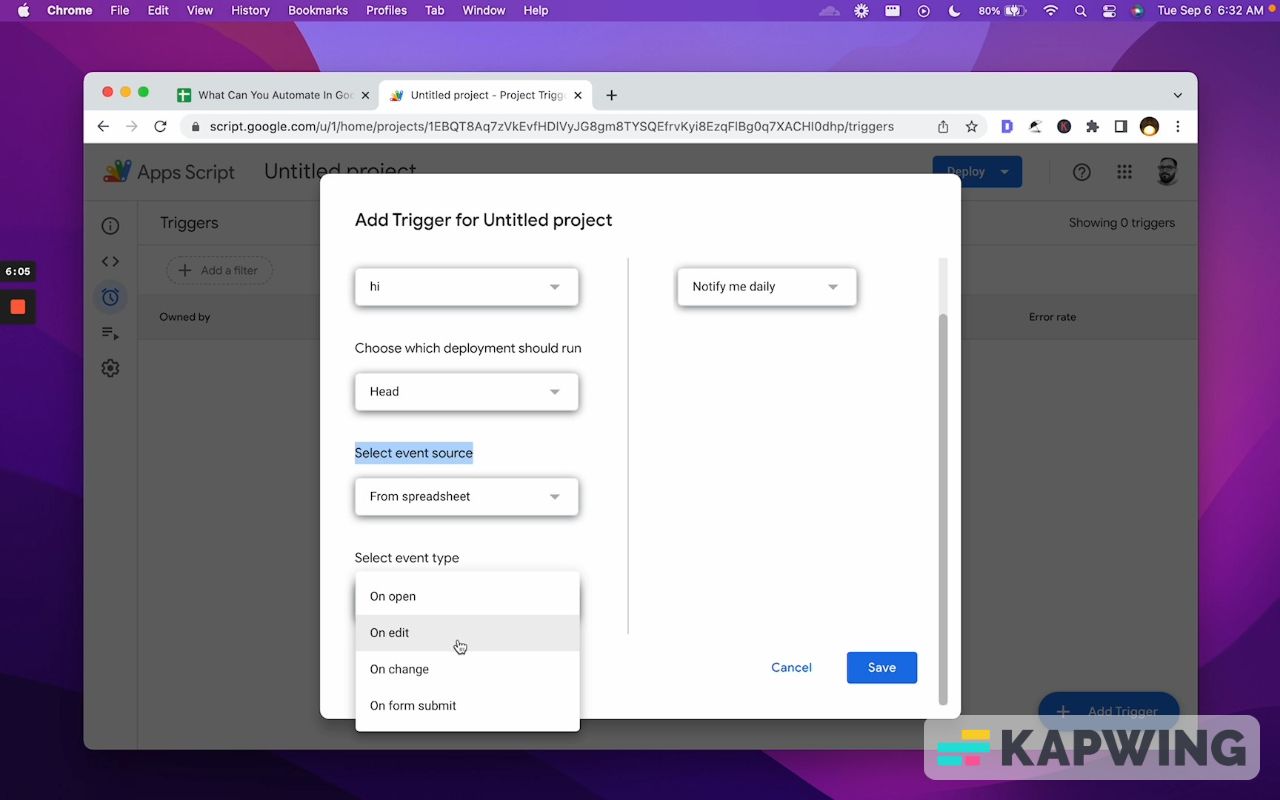
This is really, really powerful. We have “On open”, which means the moment that someone opens the sheet, something happens.
We can absolutely do that. We can say, “On open, give us the message. ‘Hi.’” We can save that. Let's look at that:
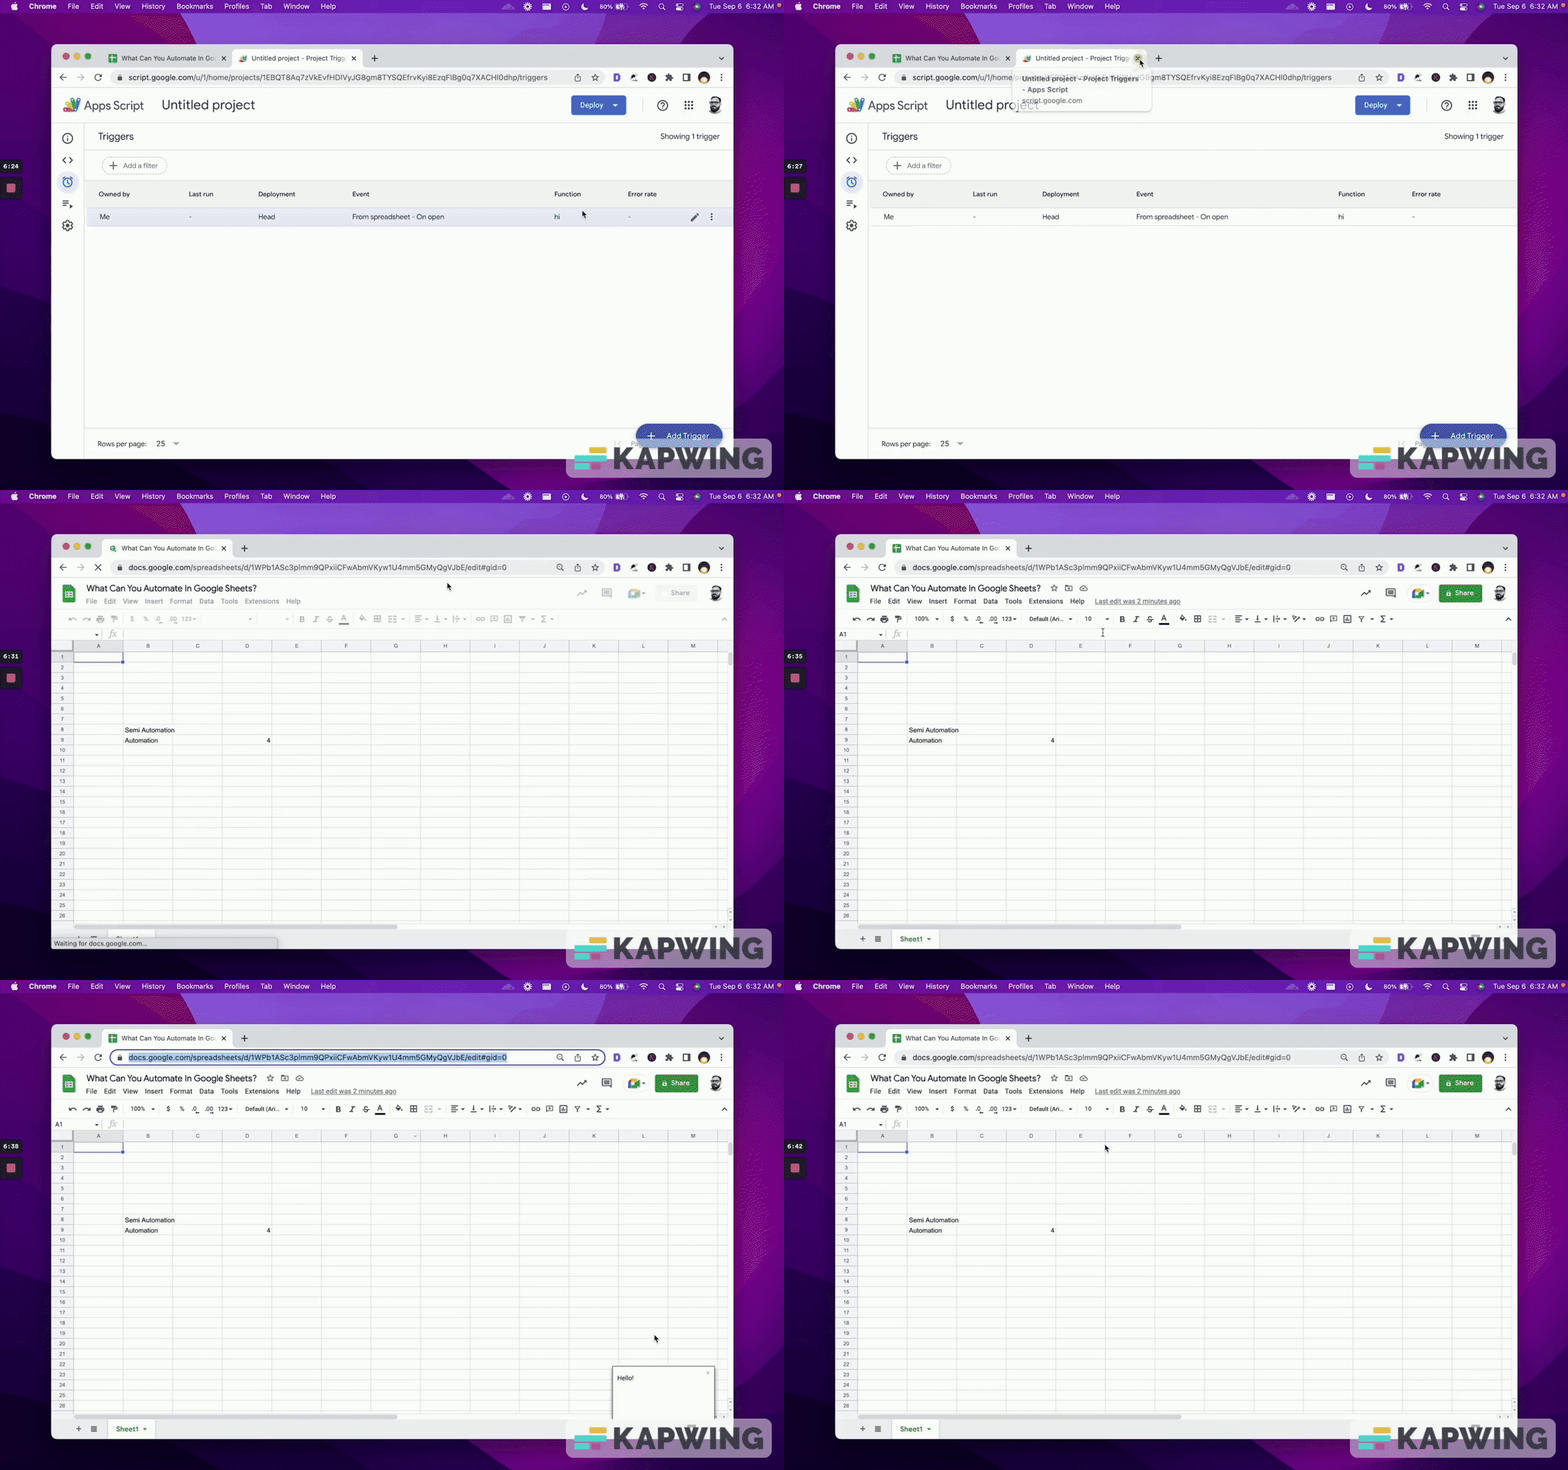
And we have a little message, a little toast message that says “Hello!” Great.
Let’s go back to our Apps Script and triggers.
We’re going to add another trigger. We’ll keep the same options, except for “Select event type.” Let’s change that to “On edit” and save that.
Now every single time that somebody edits a cell, this message pops up on the bottom right:
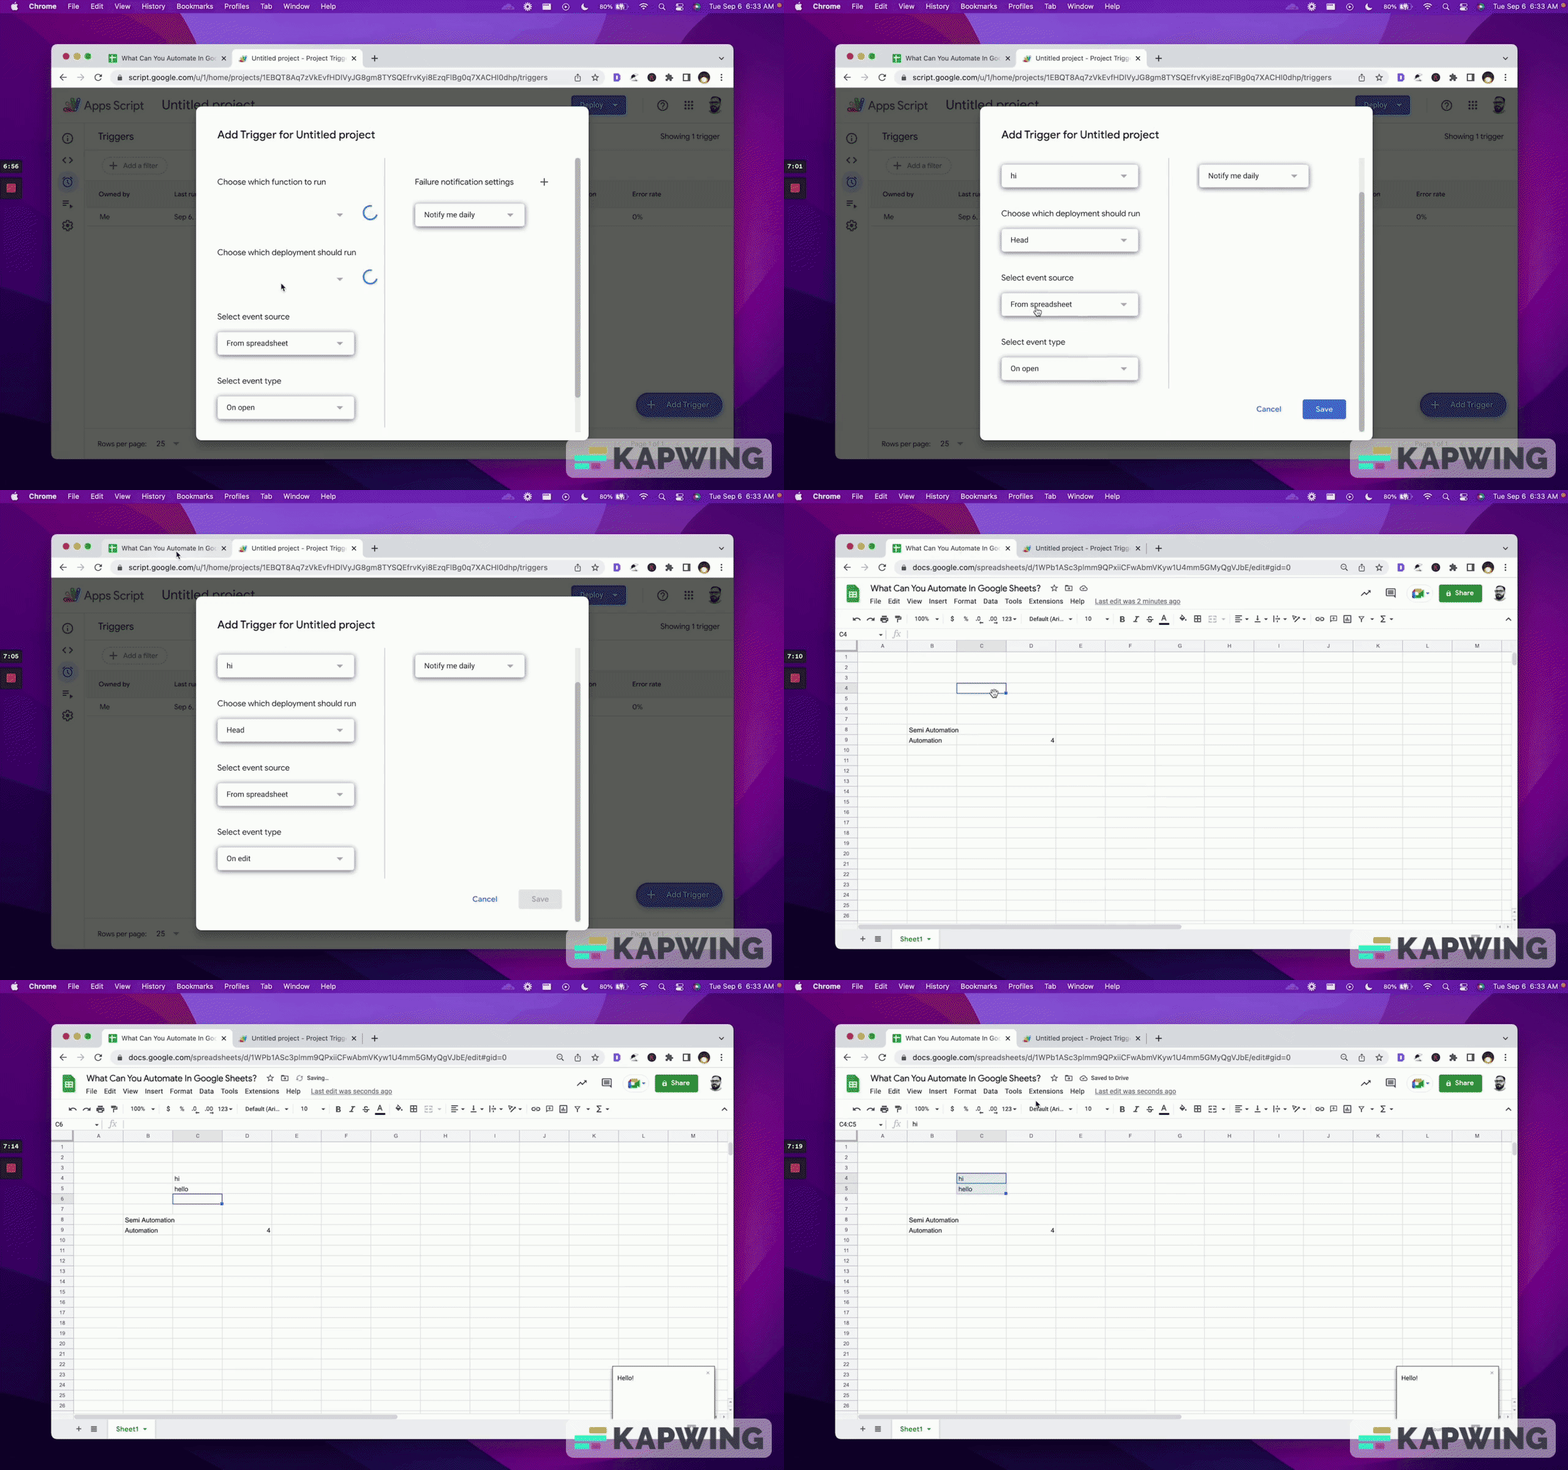
Now, that could be very, very annoying if we have a message that shows up every single time we edit. But you could also set a function that runs.
Let's say you want it if you're on a particular sheet and you want someone to know that their input has been recorded.
Not a great use case, but there are use cases for it.
Another way to do an edit: “On edit” and “On change”
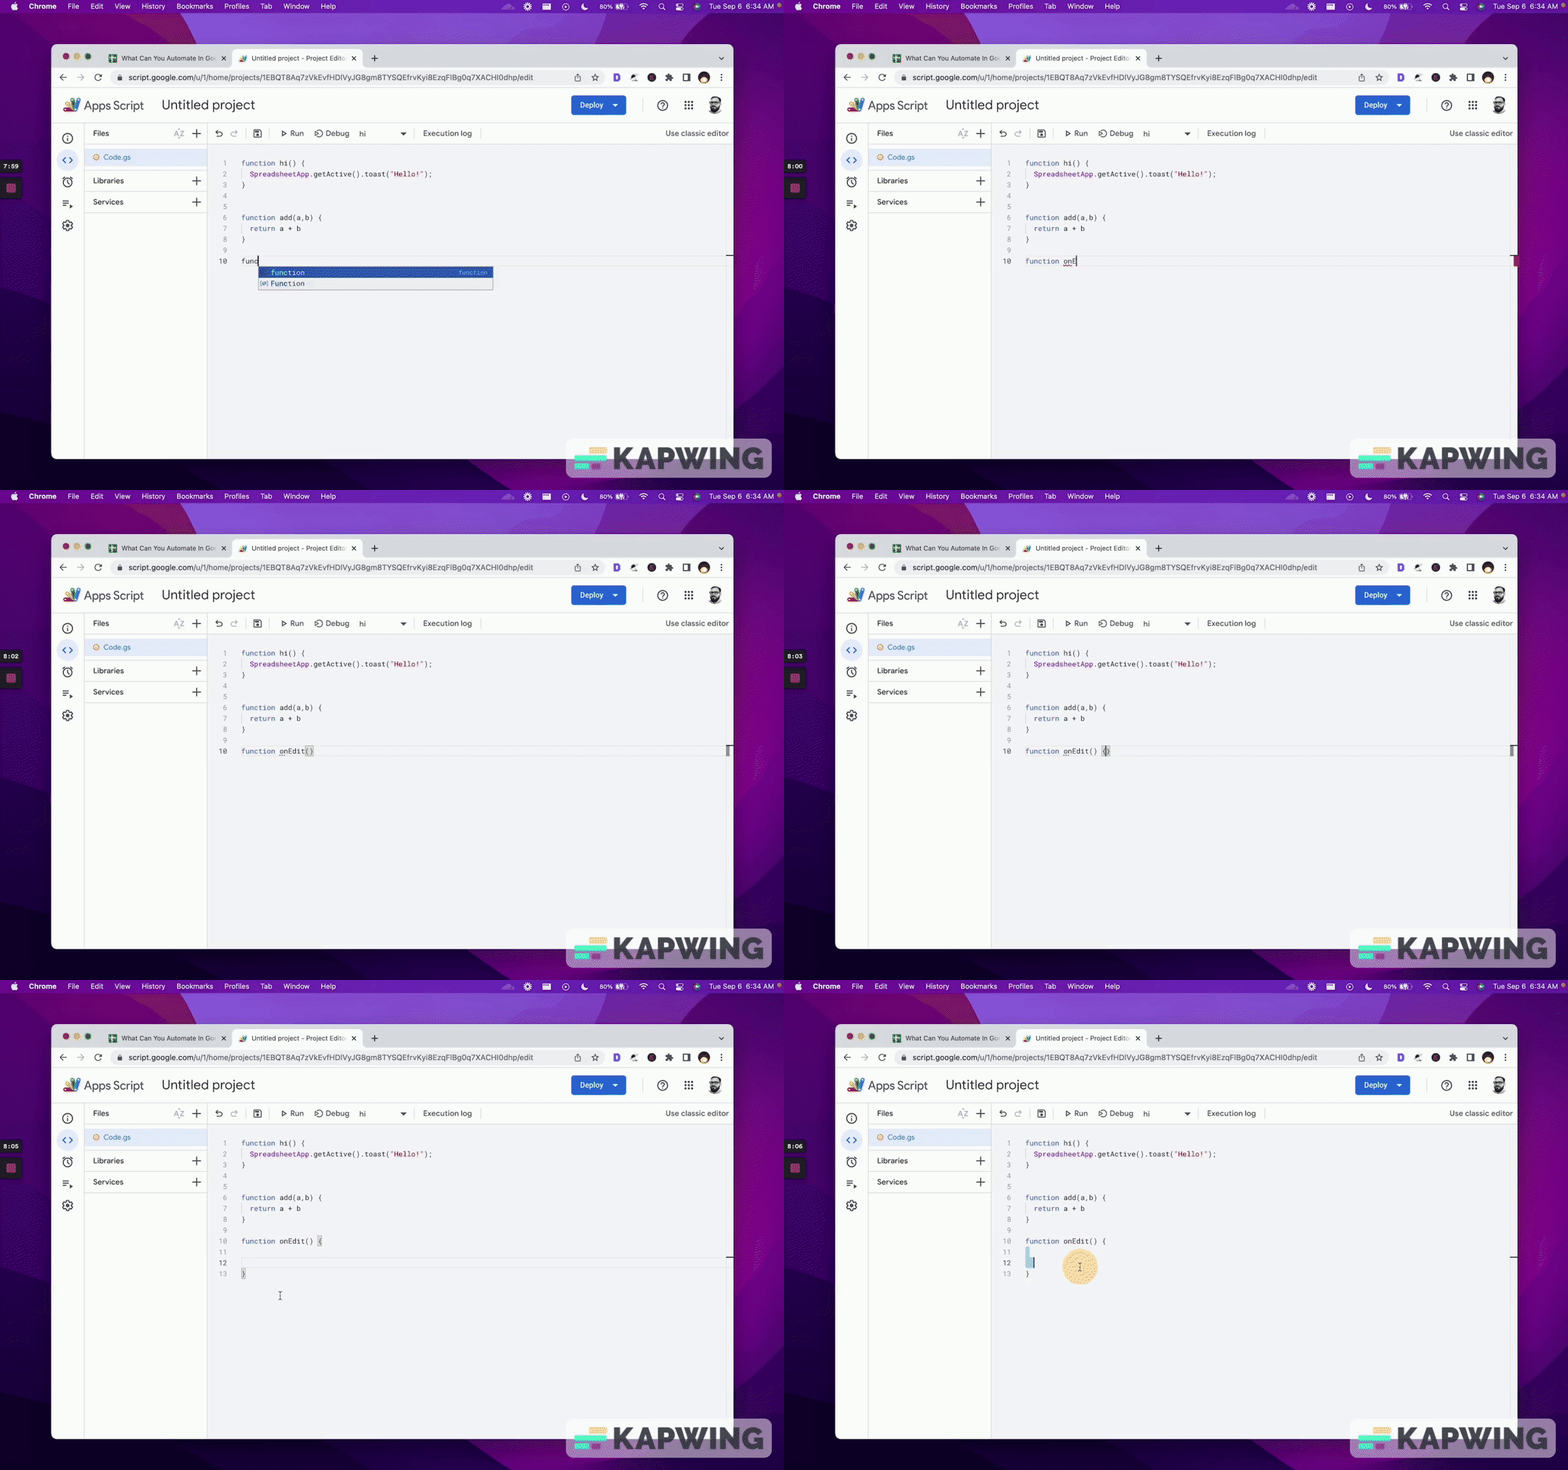
If you want to just create a function that happens on edit, you can literally do this:
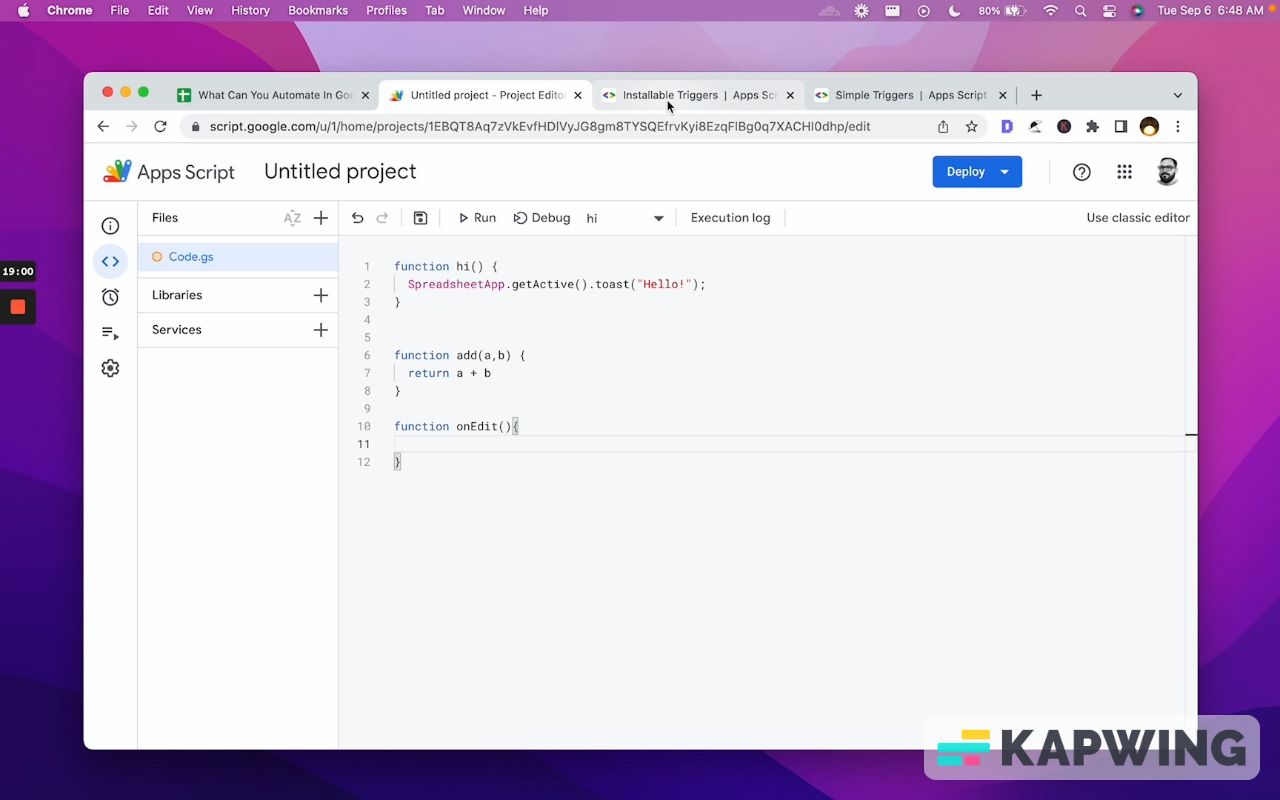
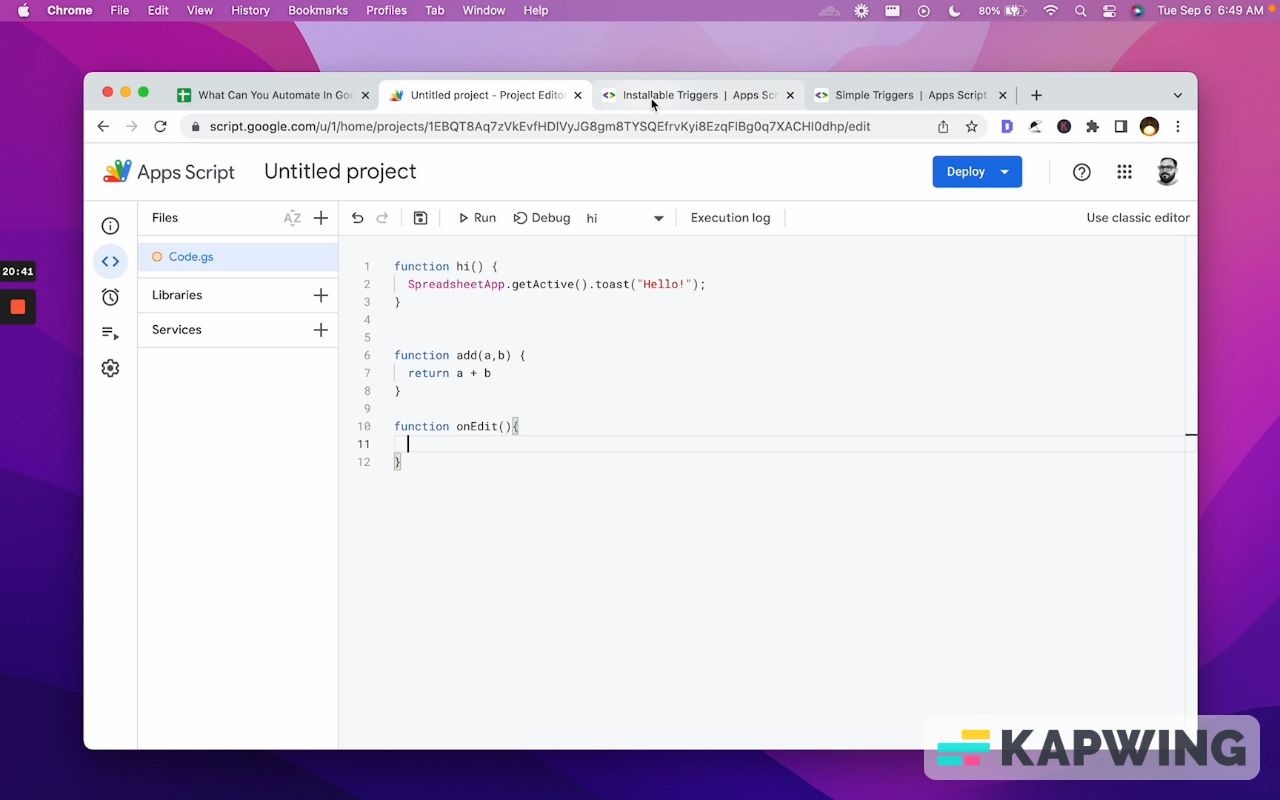
function onEdit()And anytime an edit occurs, this function will run inside of that.
Let’s keep going!
We also have “On change” under “Select event type.”
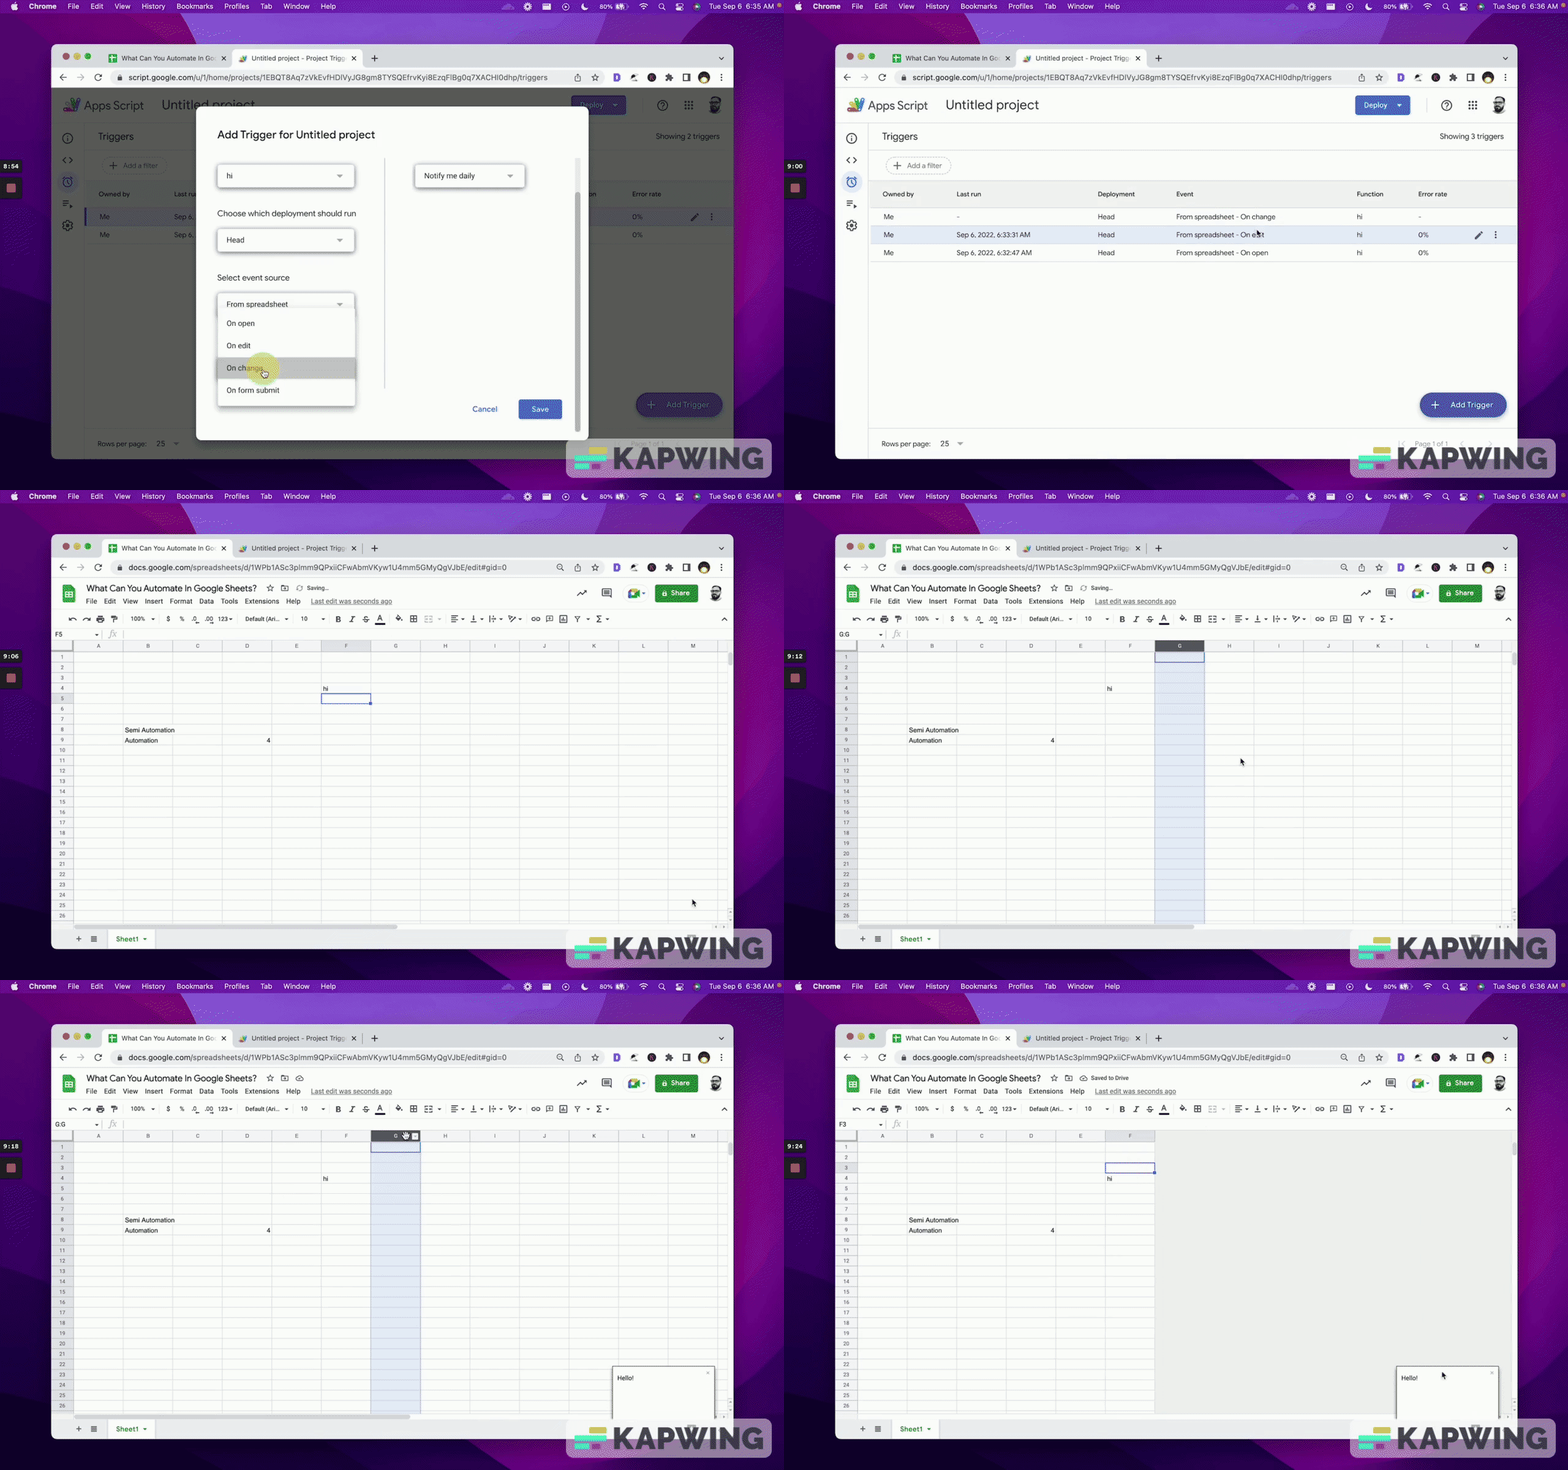
The main difference between “On edit” and “On change” is that on the former, a user is inputting data into a cell, deleting that cell, or editing any particular cell.
The latter, “On change”, is changing the entire spreadsheet. This means we’re going to delete a column, add a column, or add a tab.
We’re going to the same thing, just make the “Hello!” message appear when we delete or add a column or a tab.
So in case you want to have a little message appear whenever we add a, or duplicate or add a sheet, you can do this.
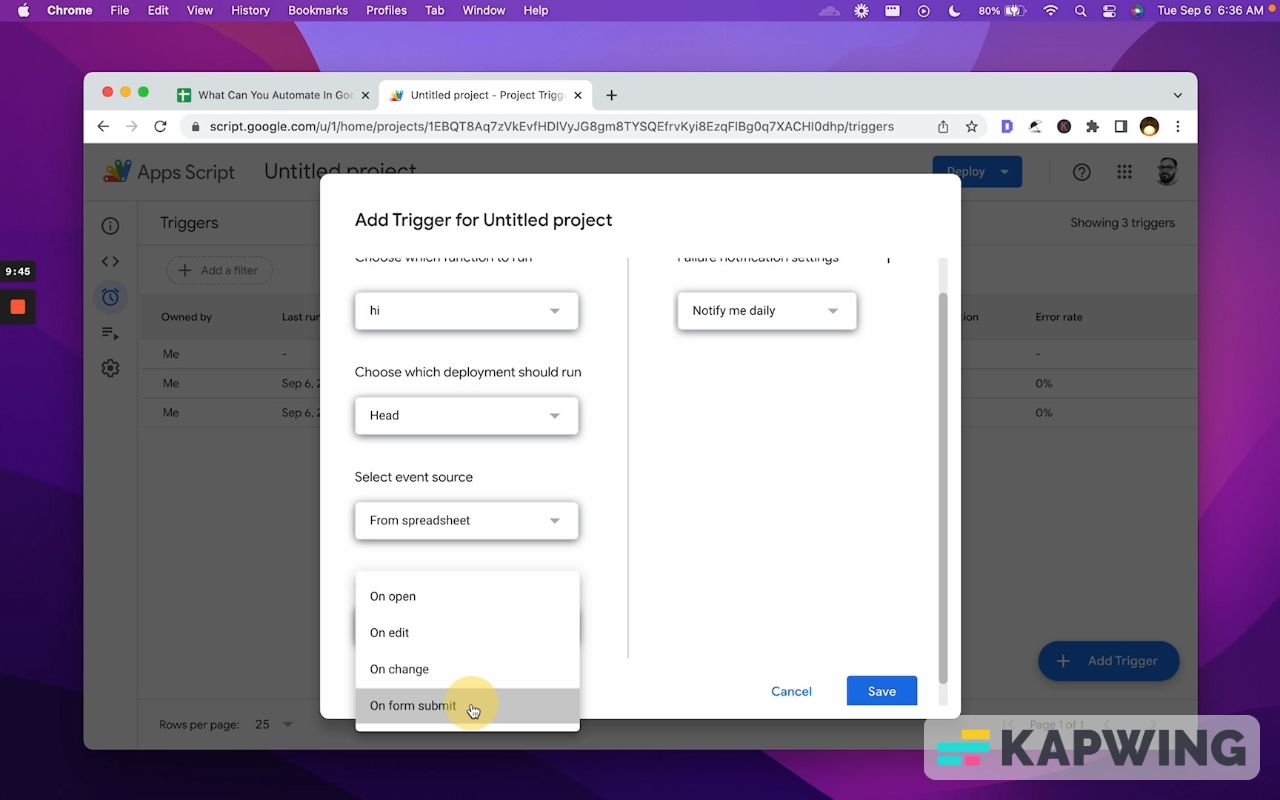
On form submit
This is really cool. This is very awesome trigger. We can trigger things like automatic emails that say, “Hey, somebody edited or submitted this form.”
Responses page will always insert a row. You want some formula to be in a row or in a column on the page that has the form responses. You want to calculate something and you usually do it on that page. But you need to do it on a separate page or use an array formula.
You can't do individual formulas. They just won't appear because you'll insert a row in that sheet.
Well, this “On form” submit trigger allows us then to use the script to say, “Hey, if you submitted a form, go and add to this column this particular formula or function.”
Select event source: Time-driven
Time-driven ends up being what people think of as automation. Things that occur hourly, daily, weekly. And it gets a little confusing here, so I want to explain a little bit.
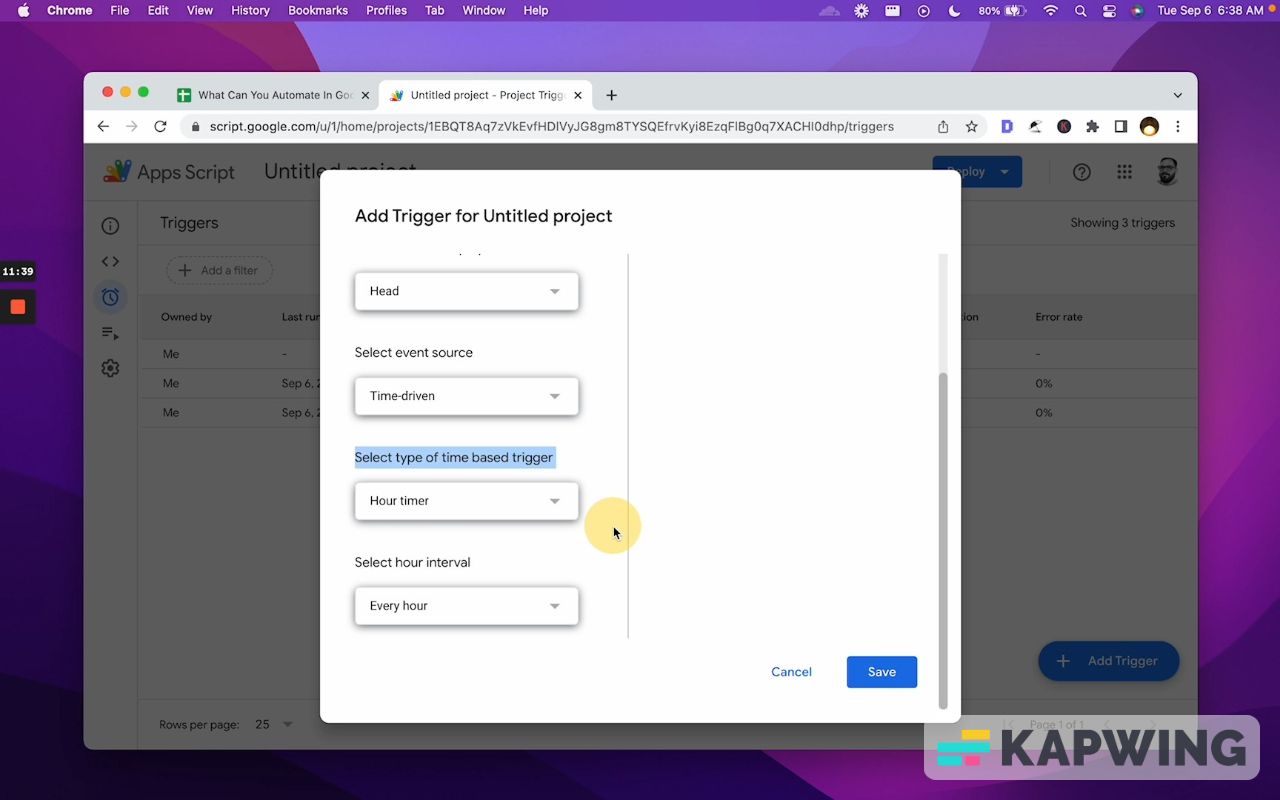
First off, when we select Time-driven, we get an extra option here: “Select type of time based trigger.”
We have hour, but we also have a specific time, date, and time minutes. So we can run something every 5 minutes or 10, 15 minutes. We also have every two hours, every four hours, every six hours, every eight hours, every 12 hours. Amazing.
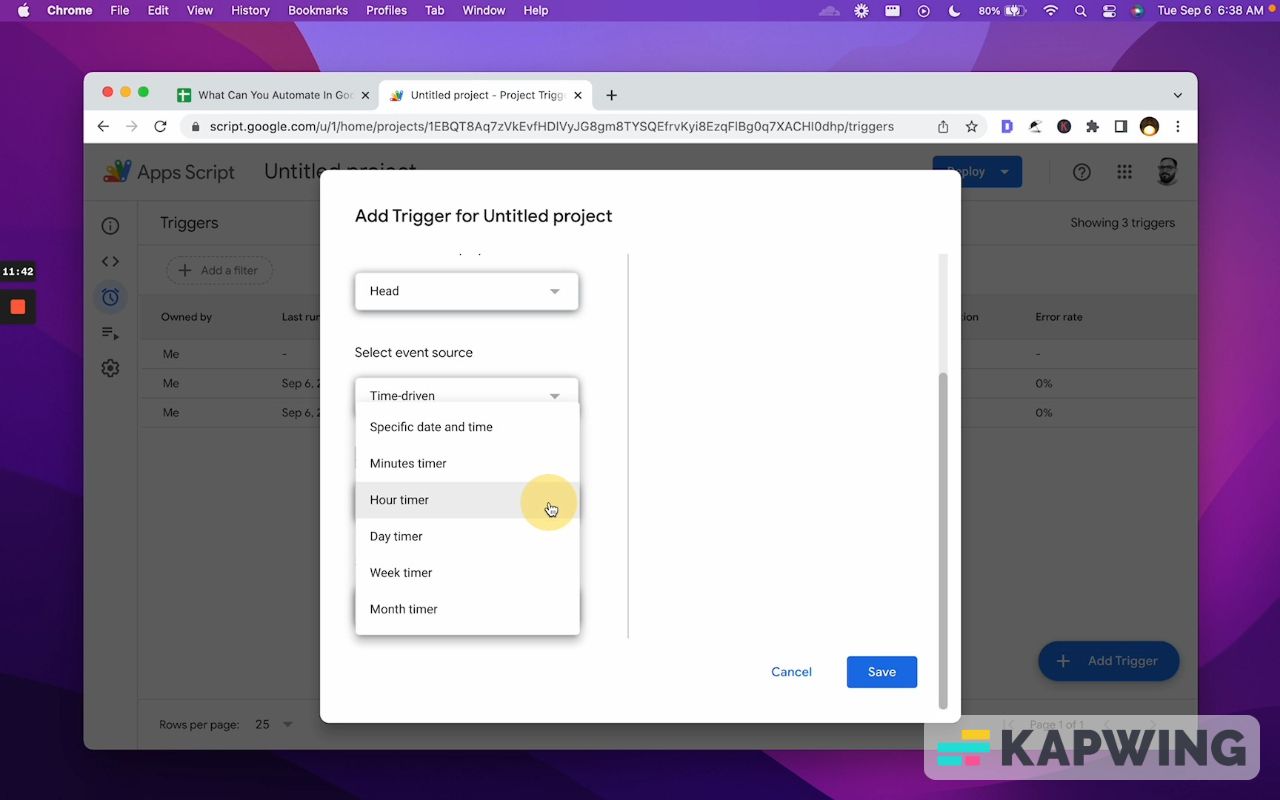
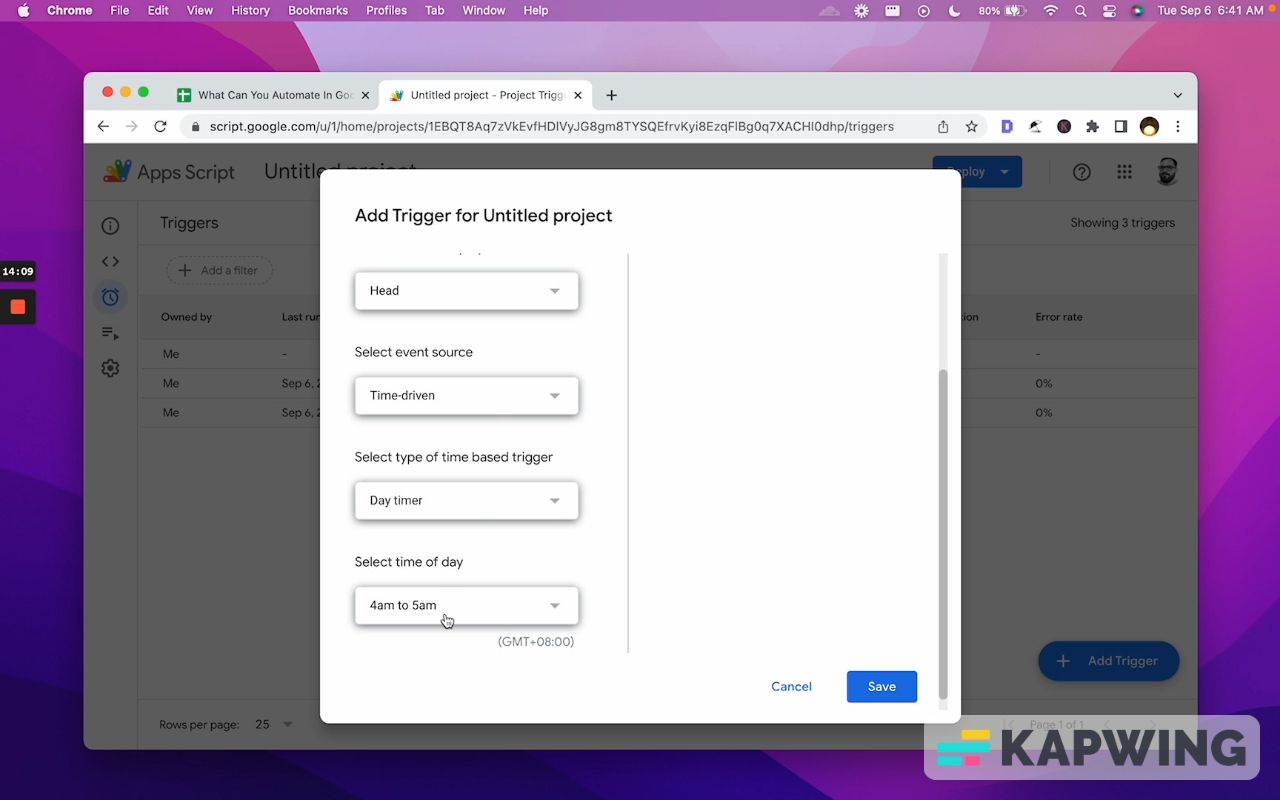
We also have Day timer, which is every single day daily, but you pick which hour. So you have 24 options here, between which hours do you want it to run.
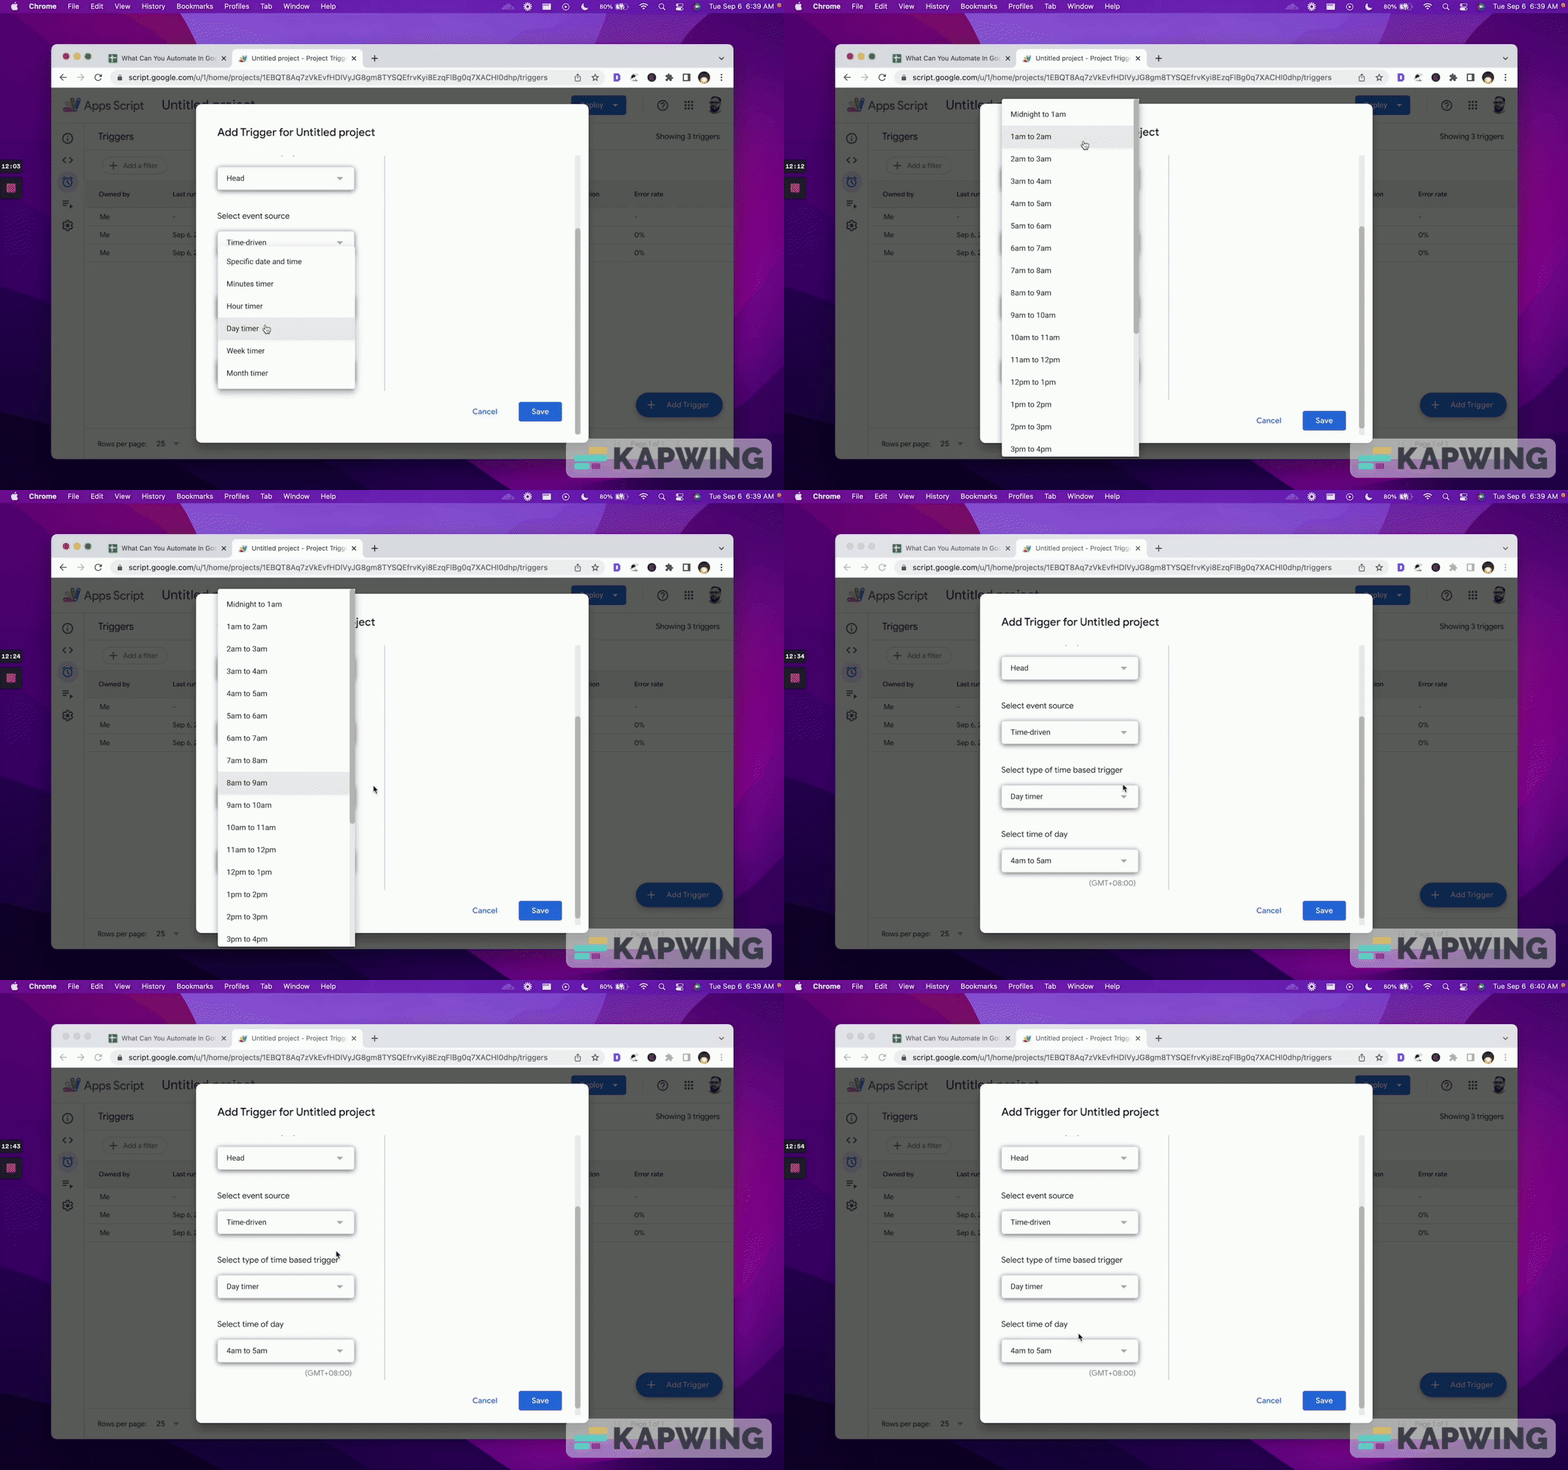
The issue with this is that it will run at some point within that hour.
What I've done in the past is I've used this timer, this Day timer a lot. If I want to compile some information, if I want to create a new day template or a new week template and execute it after midnight and before 5 AM.
I've used this Time-driven Day timer before also to redo formatting. conditional formatting gets really messy, especially if you're cutting rows over and over again.
So I wrote that script once, set this Time-driven Day timer for the hour before everyone started working or a few hours before everyone started working. And we never had conditional formatting problems again.
That's it. Just fixed it with a script.
Select type of time based trigger: Week timer
This is great for weekly reports or weekly fixes. Example: Every single Monday, we need to have this template duplicated and named for the day of the week.
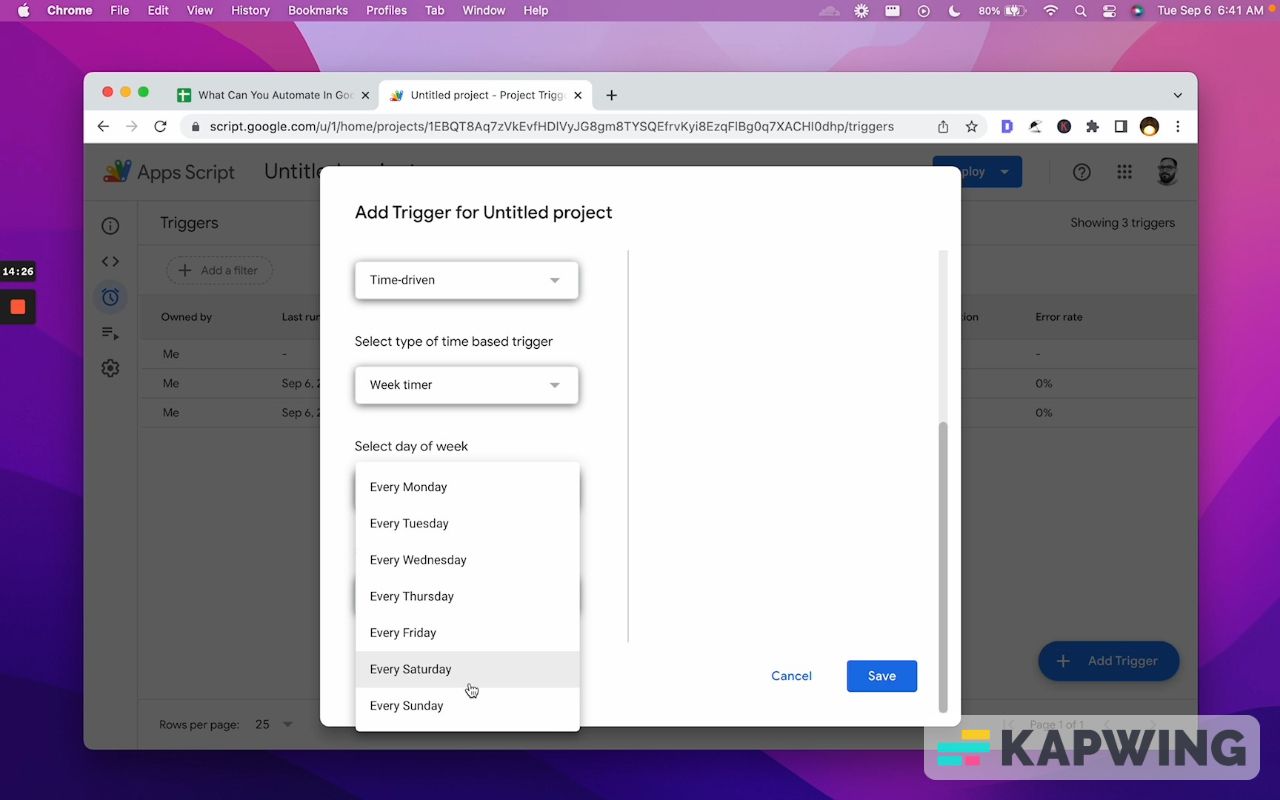
Great. Write a script. Copy the sheet. Rename and format the date and time, and that's it. Done! You can write that script and run it every single Monday for the next years, without having to actually do that. It saves you a little bit of time every single week.
Select type of time based trigger: Month timer
So last is if you have the first of the month or the last of the month or 15th. Maybe you have to do payroll on the first and the 15th every month. And you have to just send a message, “Hey, go to this sheet.”
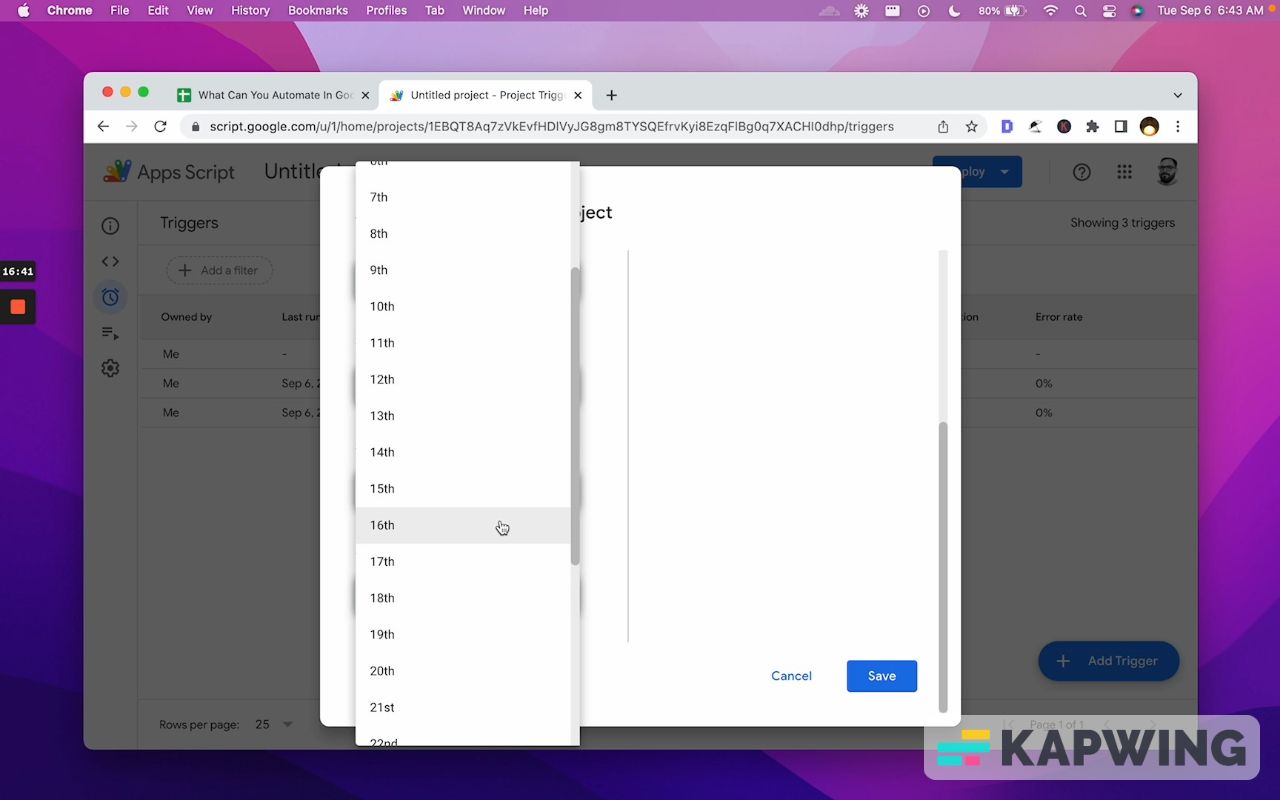
I've done triggers where I will literally email myself the link to the sheet, like a quick reminder.
Select event source: From calendar
Now, this is interesting because this connects our Google calendar to our sheet.
So you just type in someone's email address, which is the owner of the calendar (usually your own). Then you can only do “Calendar updated.” This happens when a calendar event is created, updated or deleted.
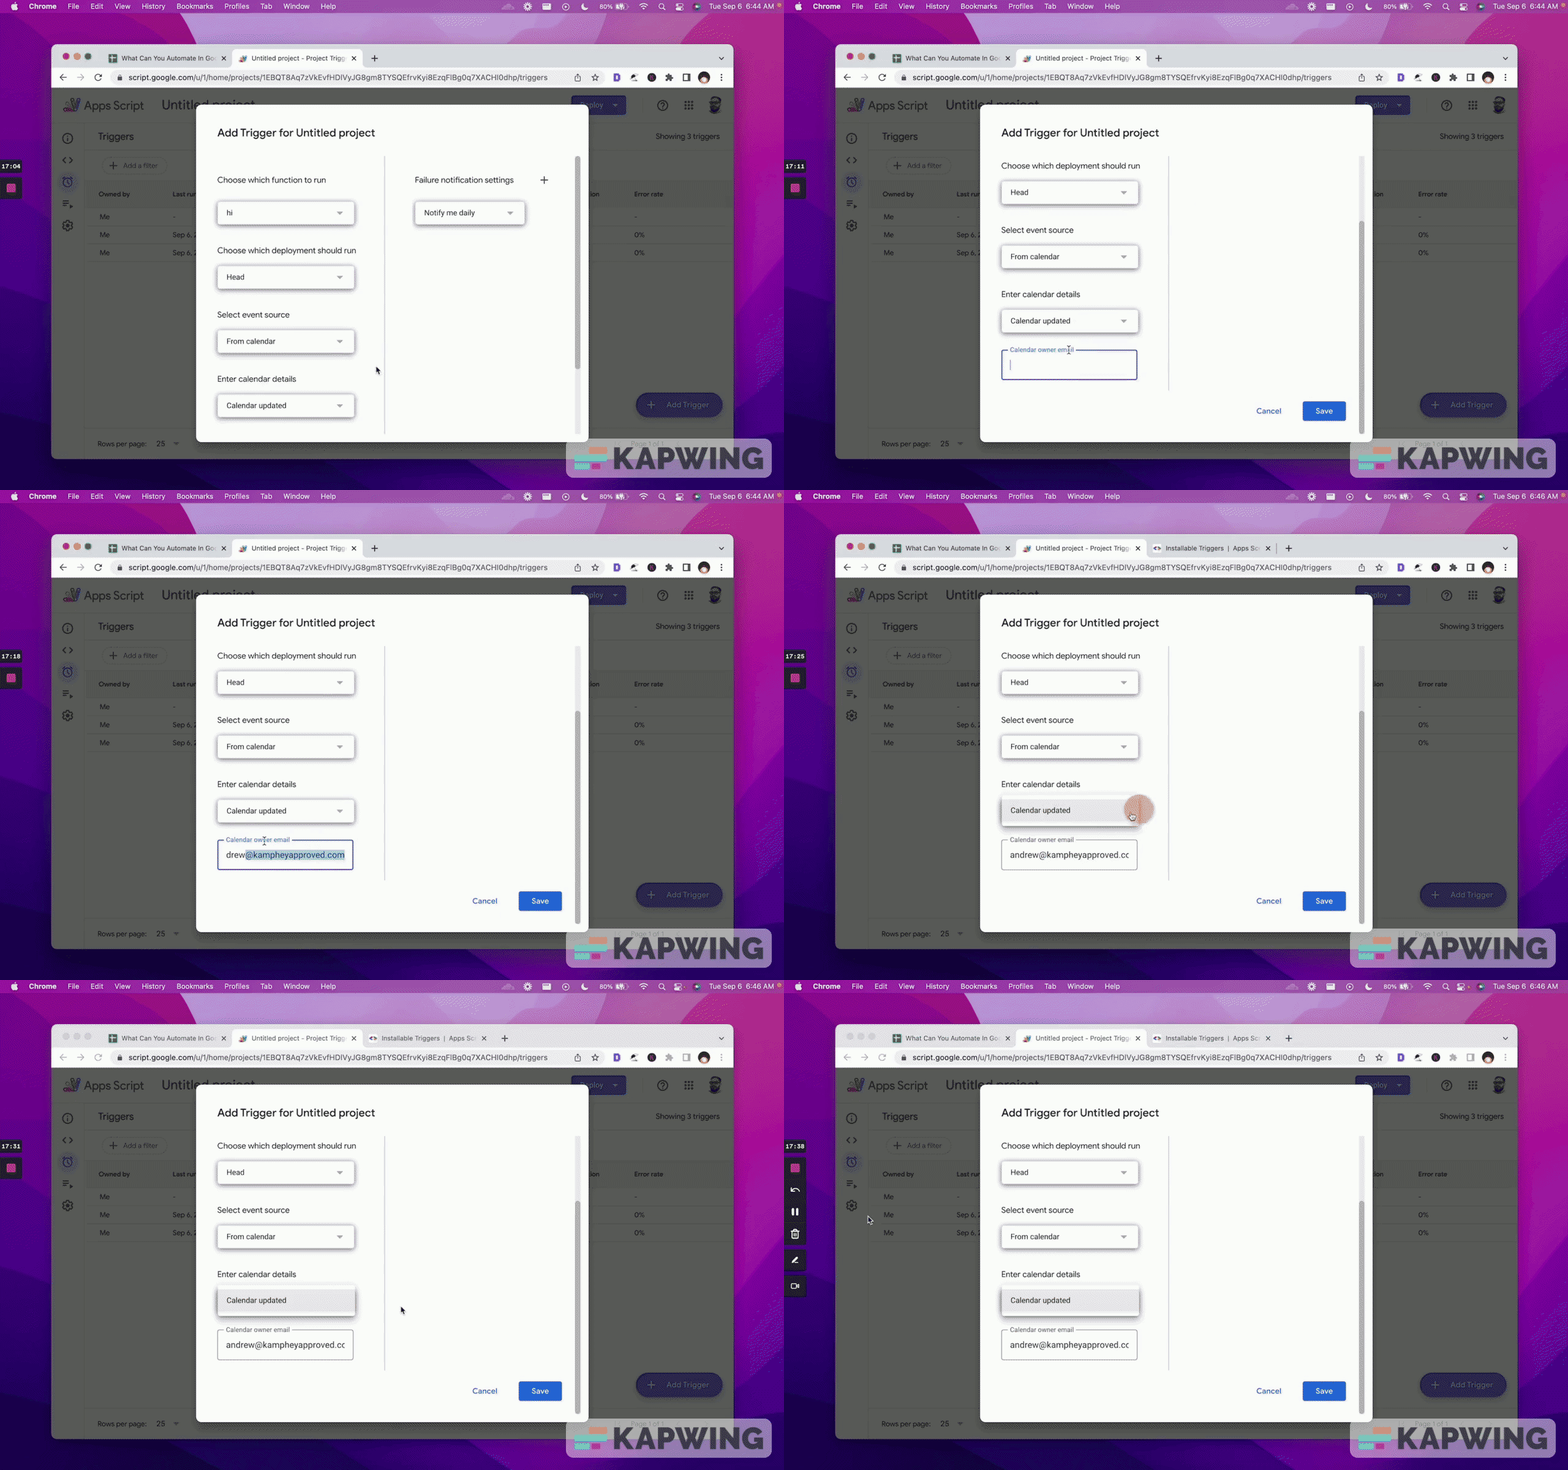
This is really cool if you ever want to connect your Google sheets to your calendar.
Now we've gone through just very quickly all of the triggers from spreadsheet, Time-driven, and from calendar that we can do. Hopefully, just walking through some of these have given you ideas on how to use these triggers with your own functions, if you're writing your own functions.
I do want to give you one more resource.
These are called triggers, but they're called actually called Installable Triggers in Google Apps Script.
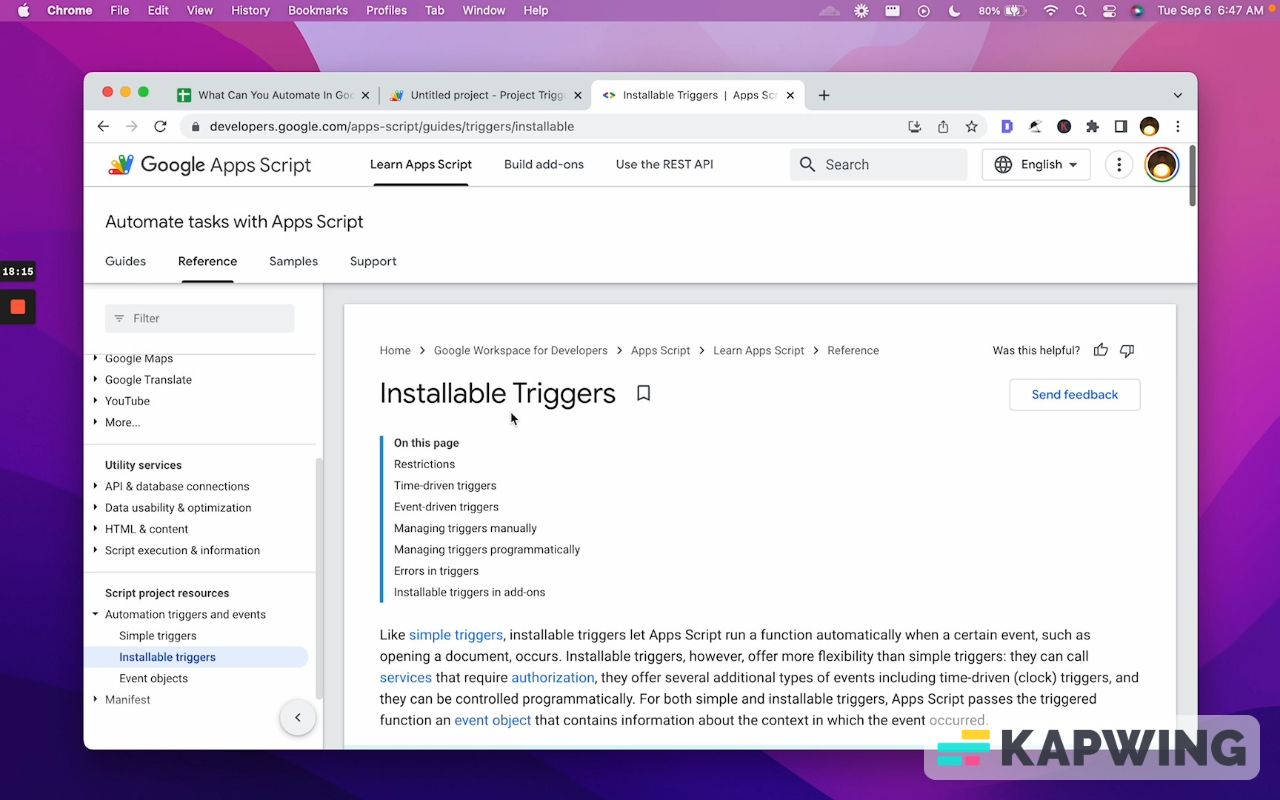
There are two types of triggers and you've just seen the Installable Triggers. The other one is called Simple Triggers and I use this a lot. I use onEdit(e) and on Open(e).
You can create a custom menu for your scripts inside a Google Sheets, and you use the onOpen trigger. onEdit I use a lot because it’s really fun. Just go to the editor and type in function onEdit().
Note: If you do this (using the curly brackets), you are using the simple trigger.
The installable triggers is what we just went through and walked through: all the time-driven and event-driven triggers.
And I really do recommend reading this and going through this Installable Triggers reference on Google Apps Script.
It might give you some more ideas. It also will share with you some restrictions, because whenever we say we want to automate something in Google Sheets, sometimes what we want to automate is impossible. That's because certain triggers might not go outside of the balance of a cell. They might just not have permission. Also, some triggers might not be able to go outside of a sheet.
There are some restrictions with this, so it's very helpful to read through these restrictions on simple triggers and installable triggers.
There's also one other thing: Simple triggers have some restrictions that are not a restriction on installable triggers.
onEdit function has some restrictions. I can write onEdit and make it super-fast and super quick. If I wanna do some things, I need to write the function in the editor and then use an installable trigger.
I would just highly recommend that if you enjoyed this tutorial and have some ideas, go through Google App Scripts Installable Triggers and get a little bit more information.
Hopefully this has been helpful. Thank you so much. And this is now what you can automate in Google Sheets. Don’t make sheets. Make Better Sheets.
Watch this tutorial as a video:
Learn more about automations in Google Sheets:
Get more Google Sheets Tutorials
Join other members with a one-time payment of $119. Pay once and own it forever. It's the deal of a lifetime! Check out this page and find out what's in store for you when you get a lifetime access.


